Security > Secure Key Manager > Console User Guide > Getting Started
Getting Started describes basics for the use of Secure Key Manager.
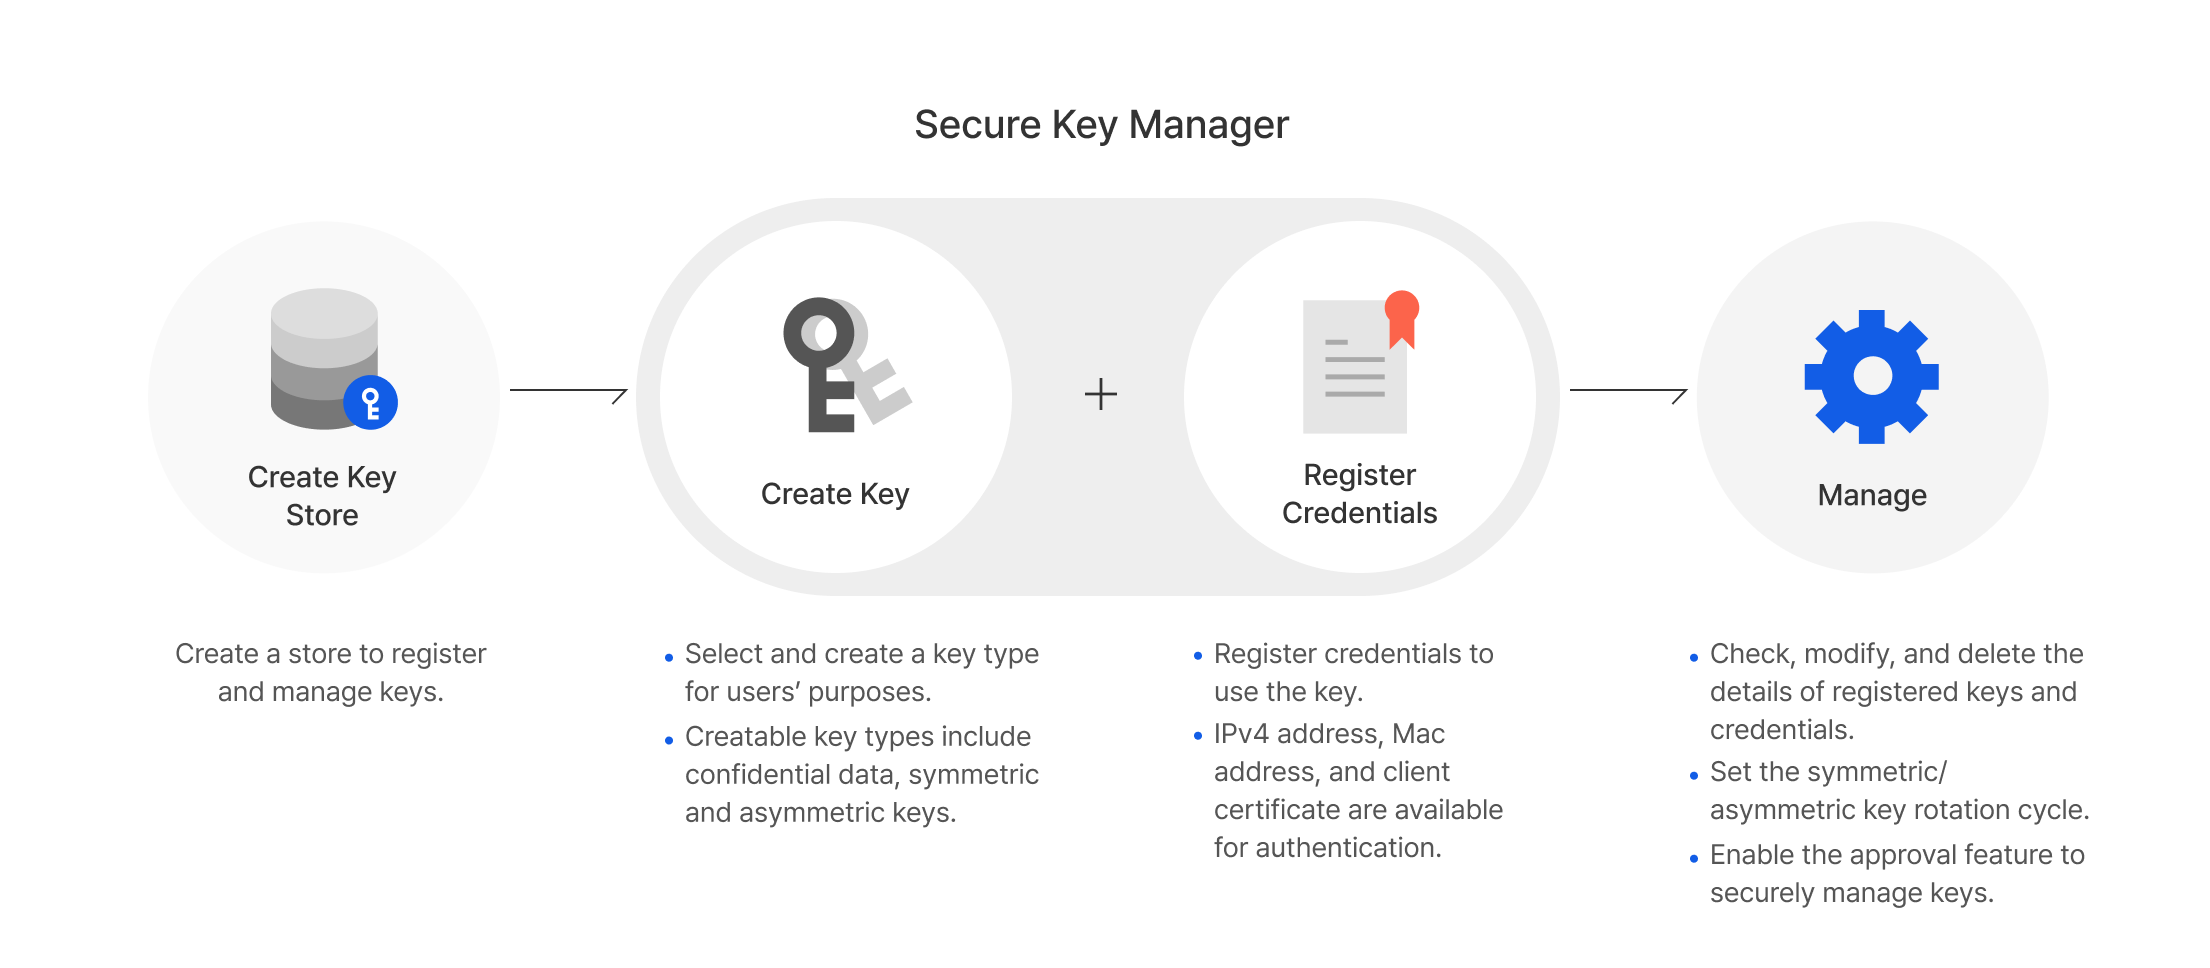
Create a Key Store
Secure Key Manager manages authentication information and keys in key store unit. If there is no key store, the following screen is displayed:
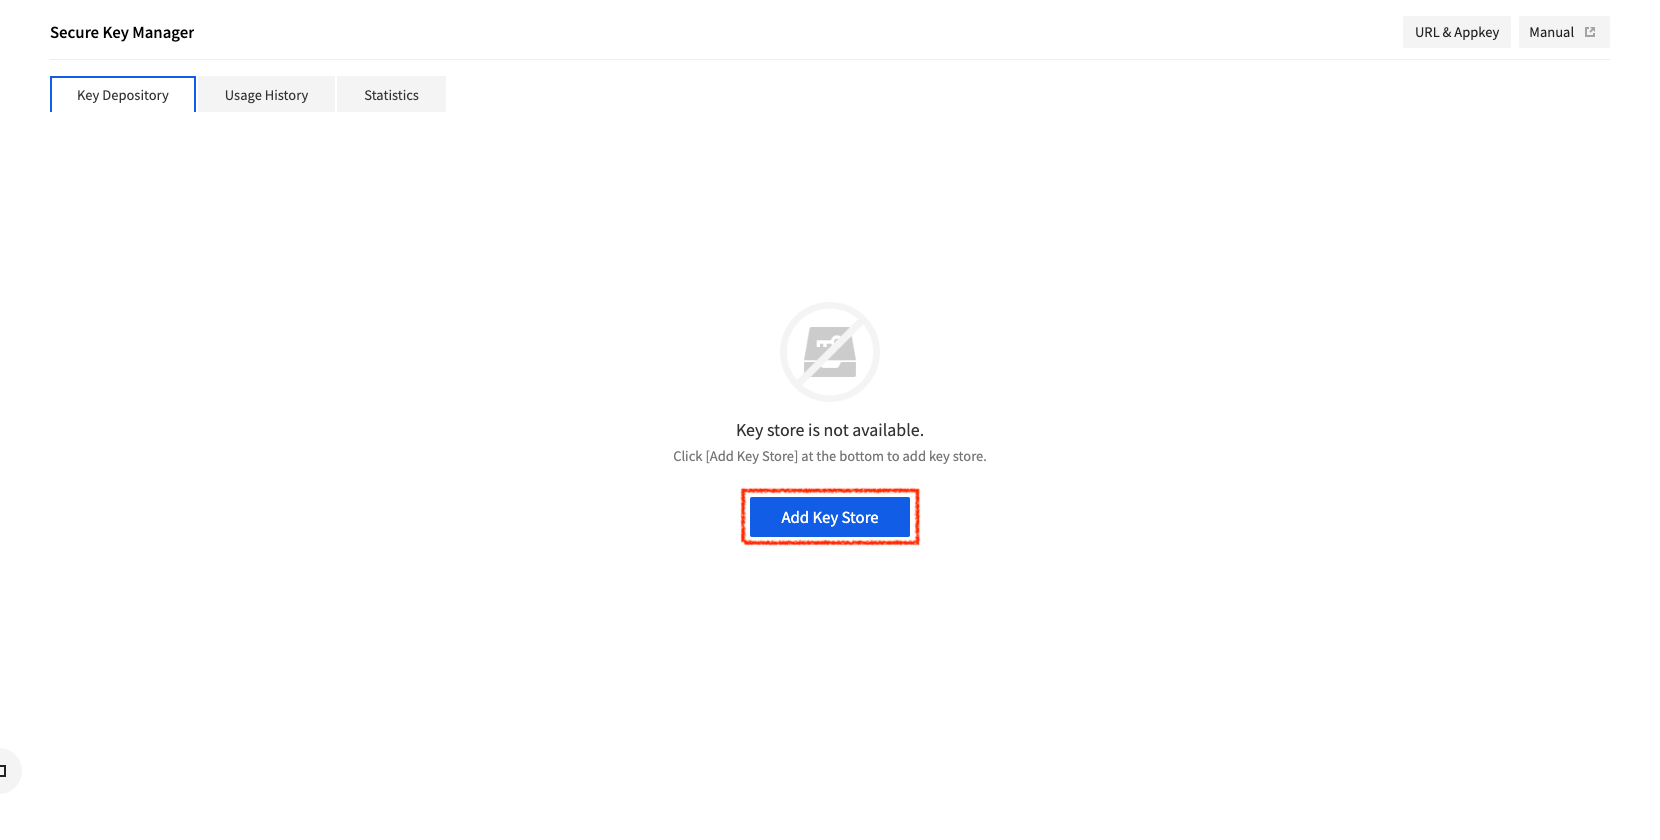
Click Add Key Store, and a window to create a key store shows up.
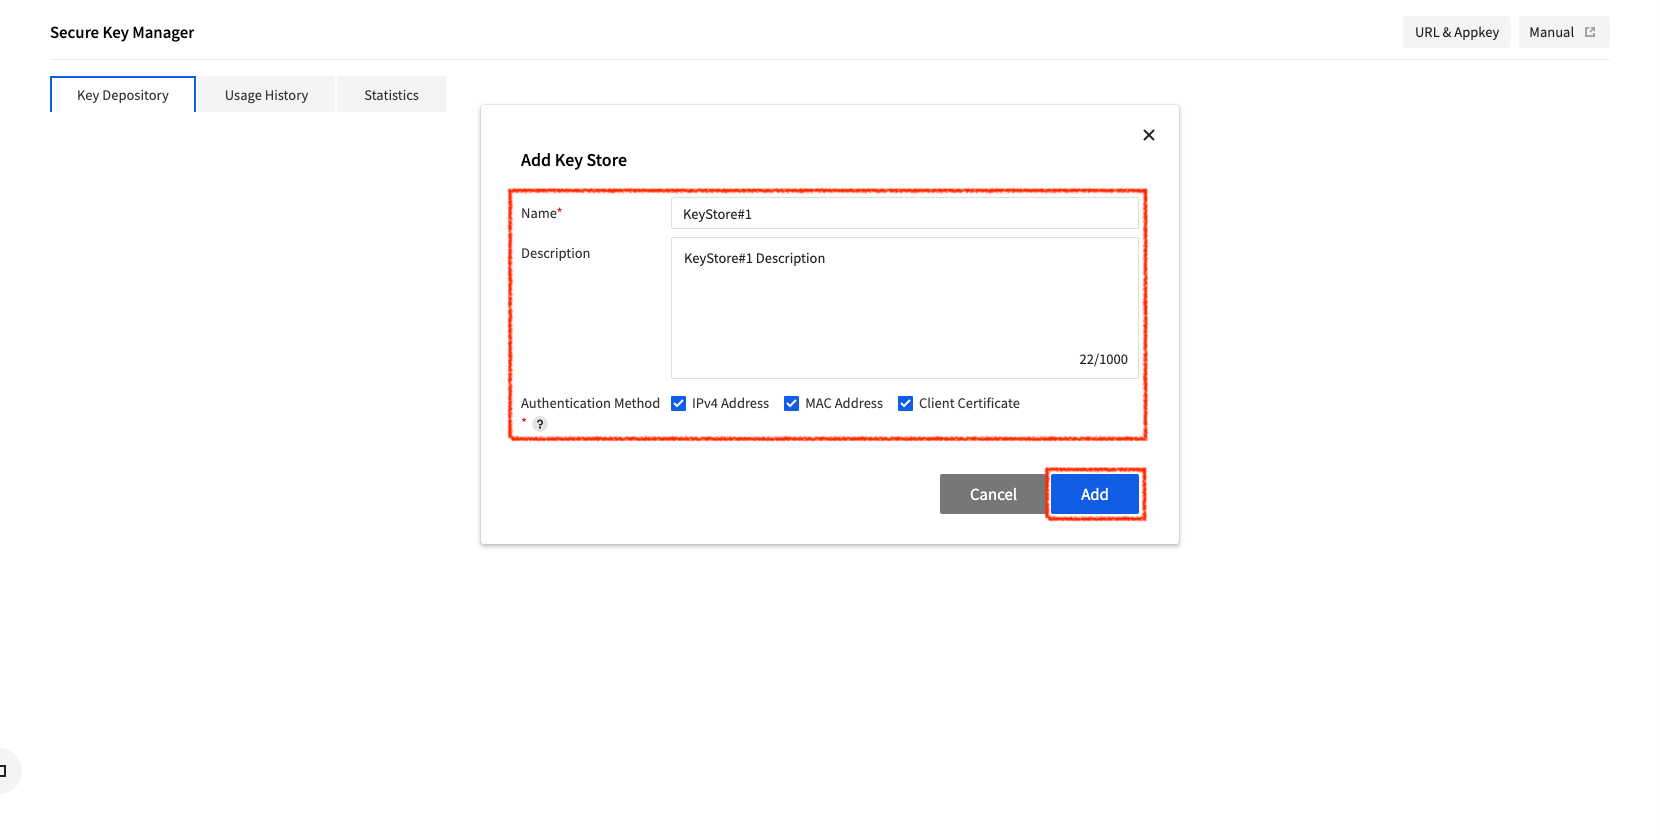
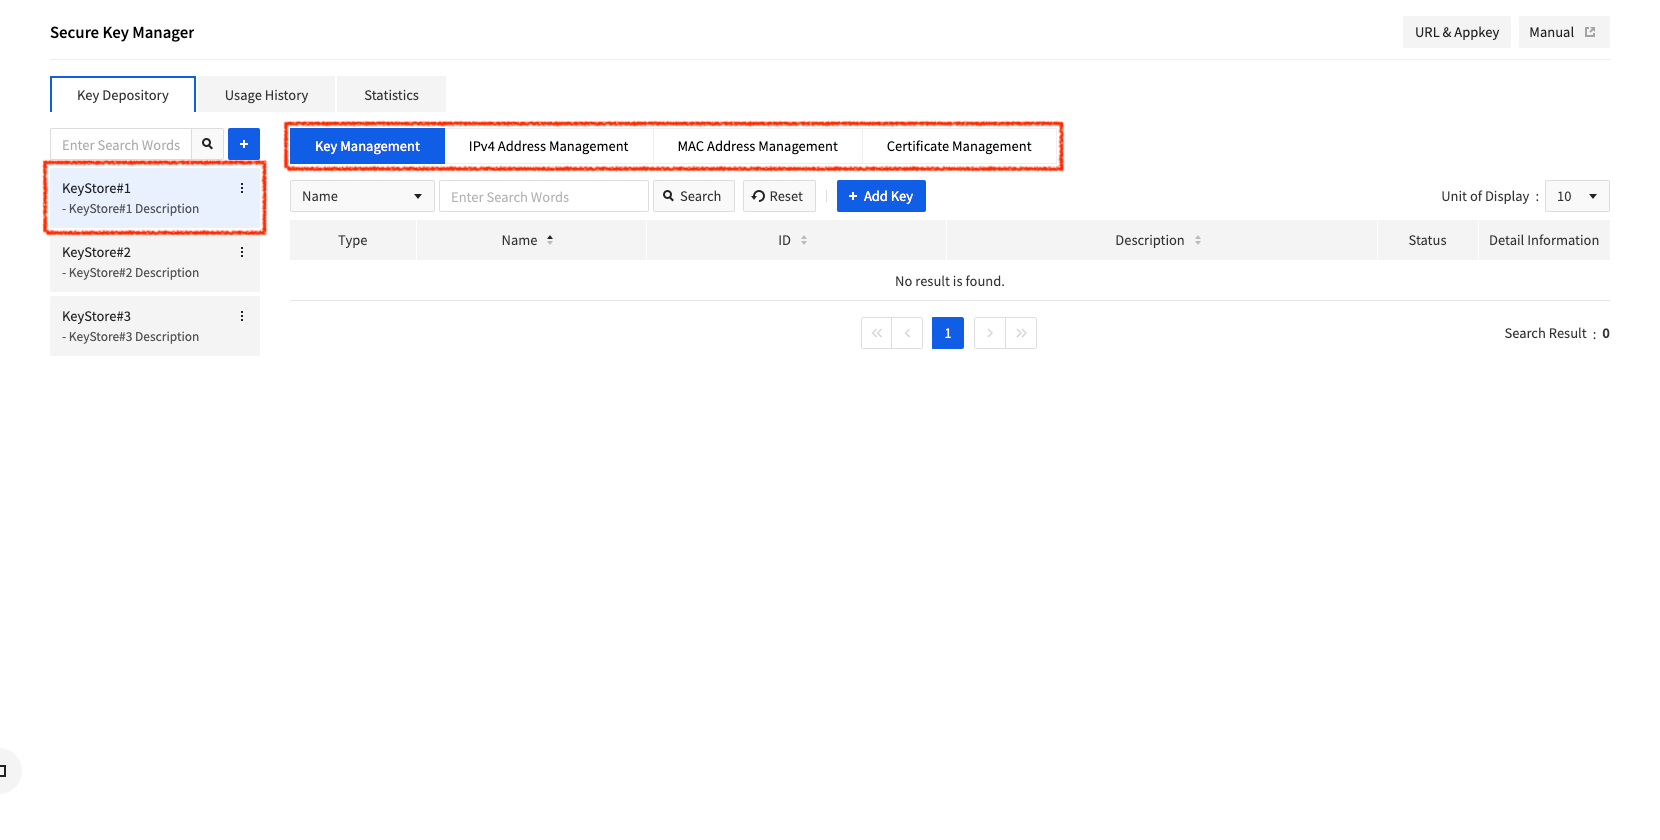
Enter name and description, select one or more authentication method, and then click Add, and a key store is created. The newly created key store shows up on the list of key stores like below:

Click a key store from the list, and a menu to manage the key store is displayed as below:
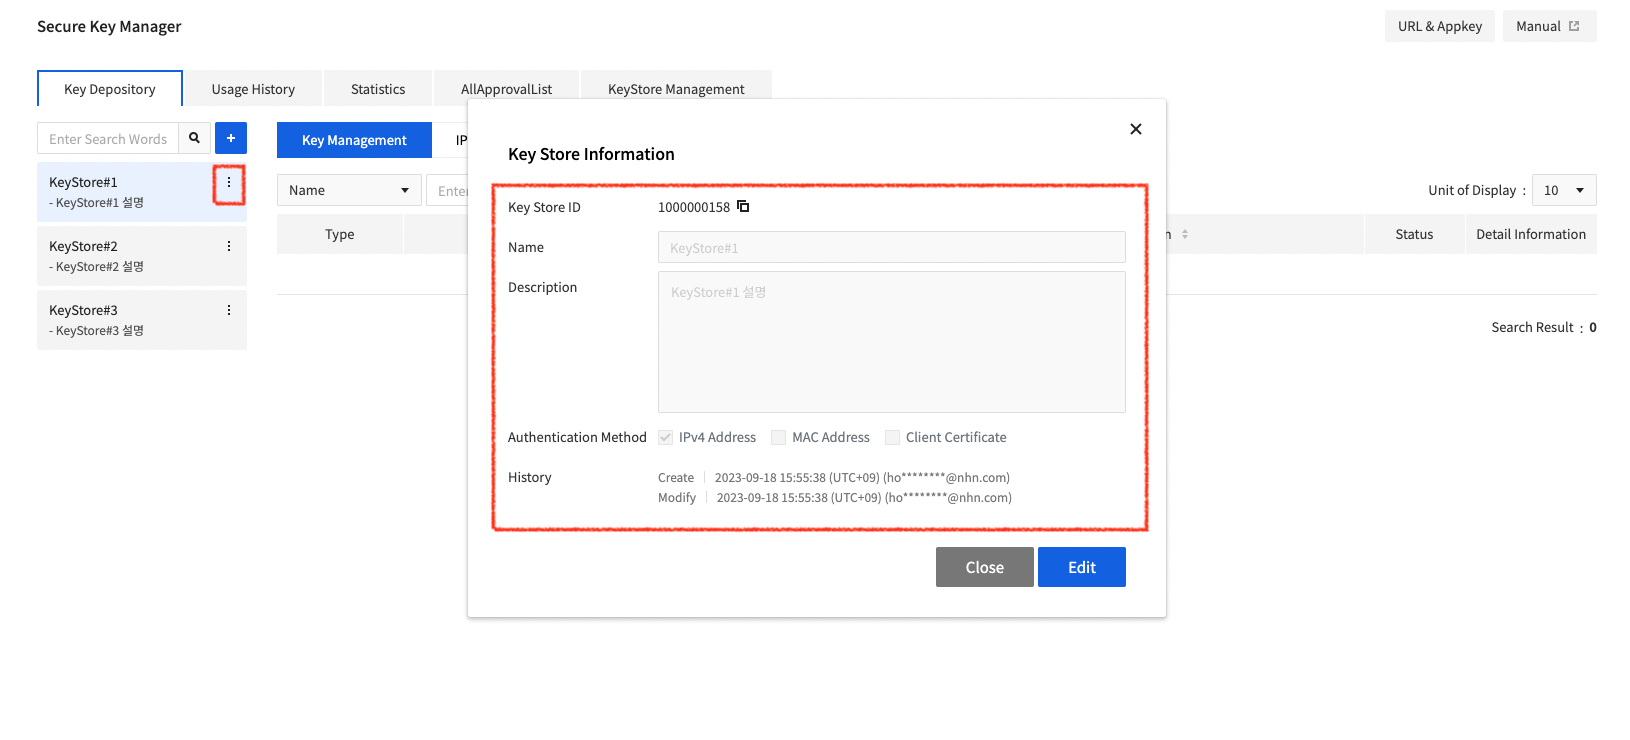
Key Store Details
Click the View more button in the top right on the keystore to view information about the selected keystore through the Details menu.
Create a Key
In Secure Key Manager, keys are categorized into three types: Confidential Data, Symmetric Key, and Asymmetric Key. For Confidential Data, Secure Key Manager stores string data and provides query feature using APIs. For Symmetric key, data encryption/decryption using APIs is provided. For Asymmetric Key, data signing/verification using APIs is provided. Users can select a key type appropriate for purpose and create keys.
Click Key Management, and a page to manage keys shows up like below:
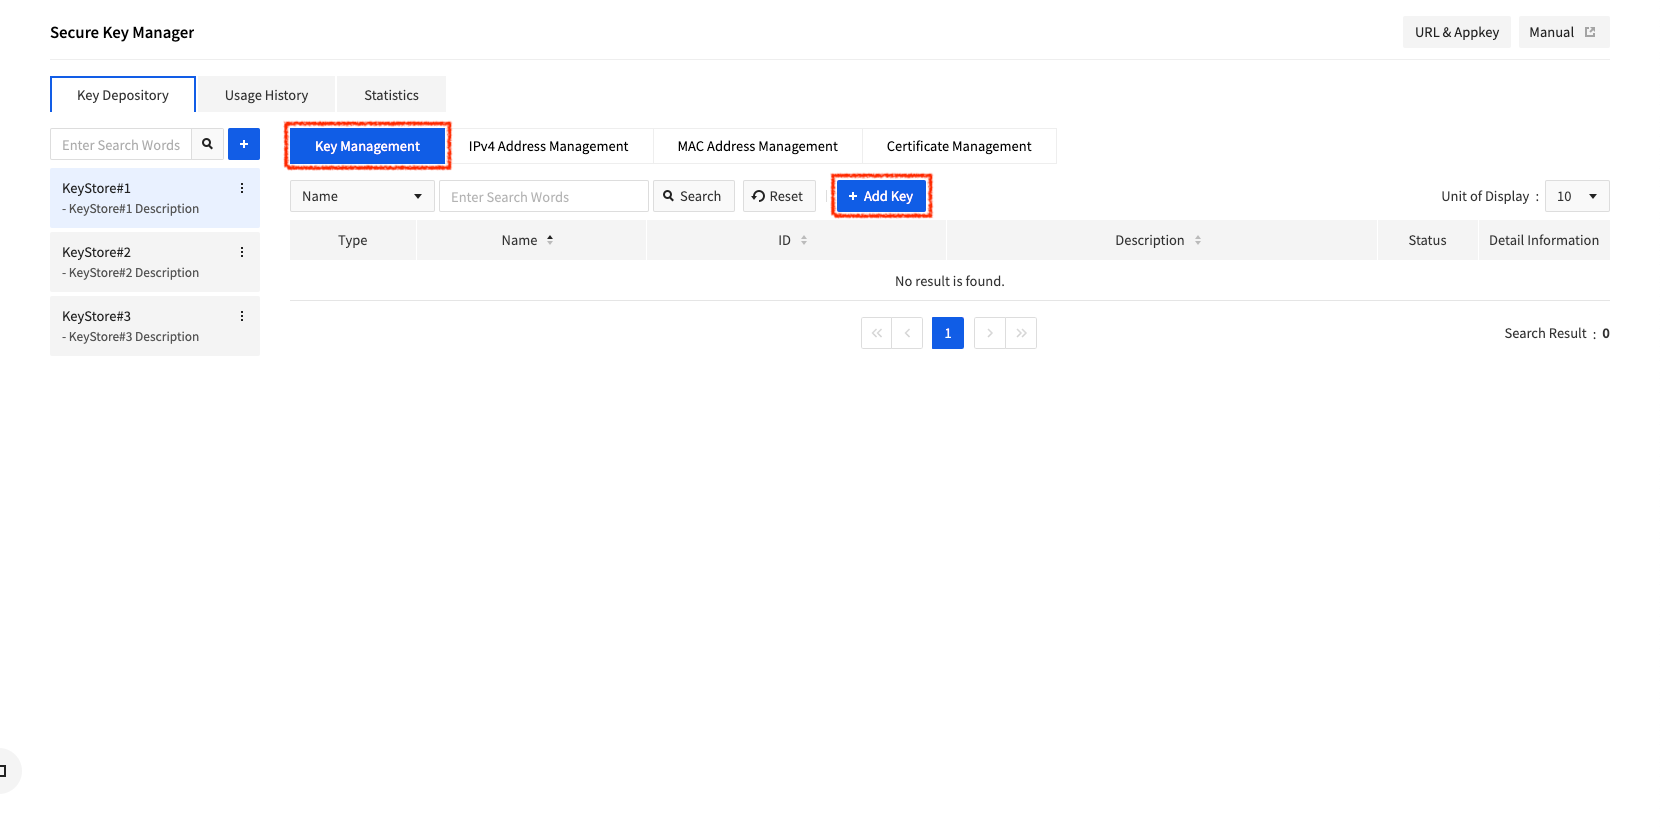
On the key management page, click Add Key and a window to create a key is displayed. Depending on the selected key type, you may enter data as needed.
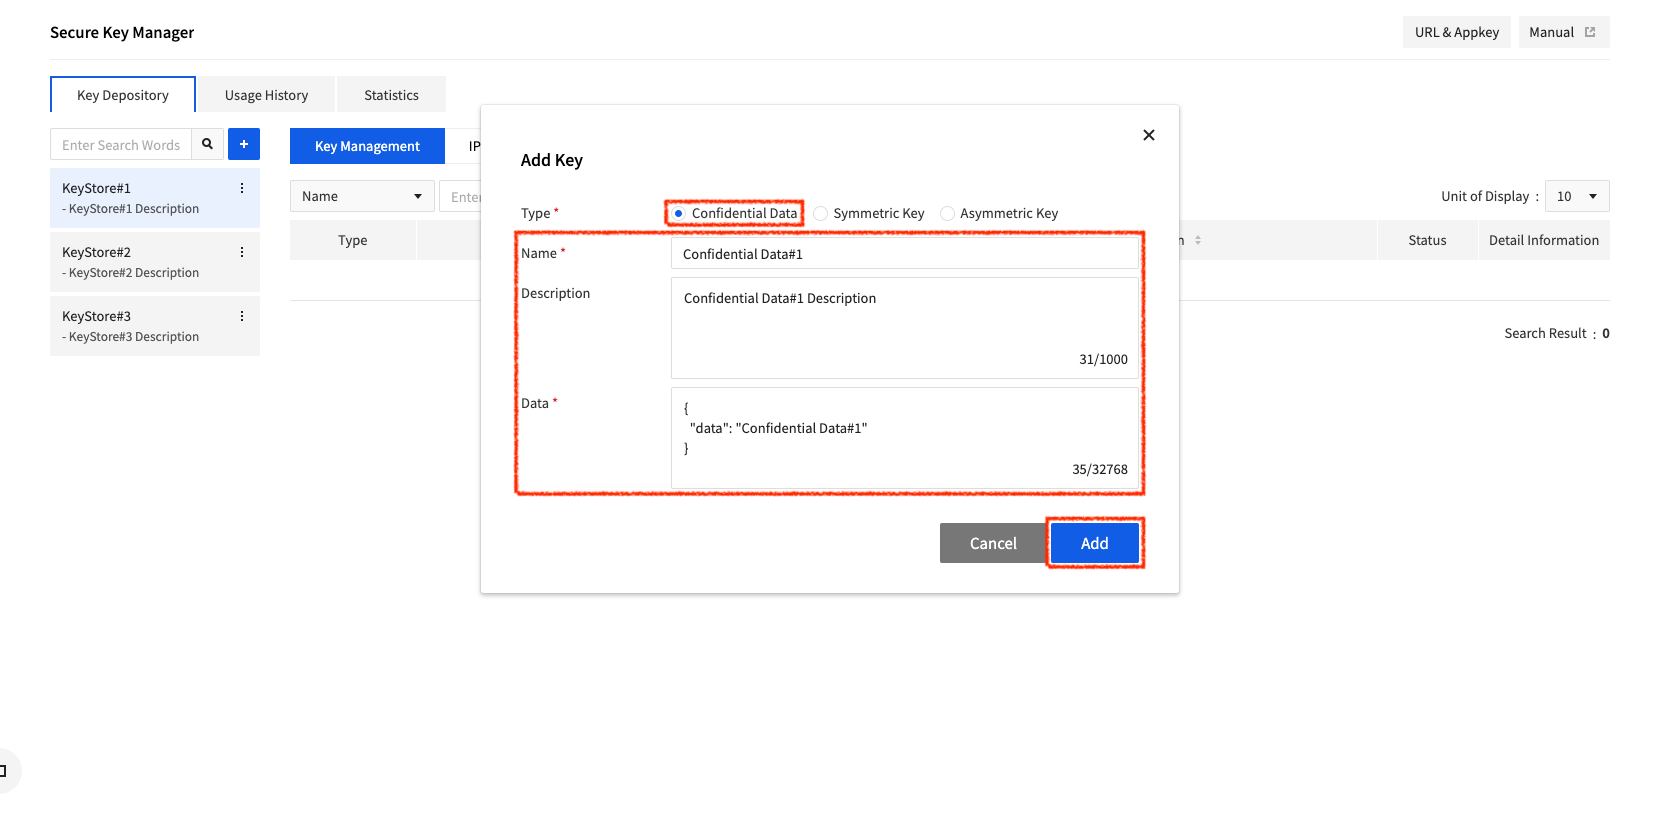
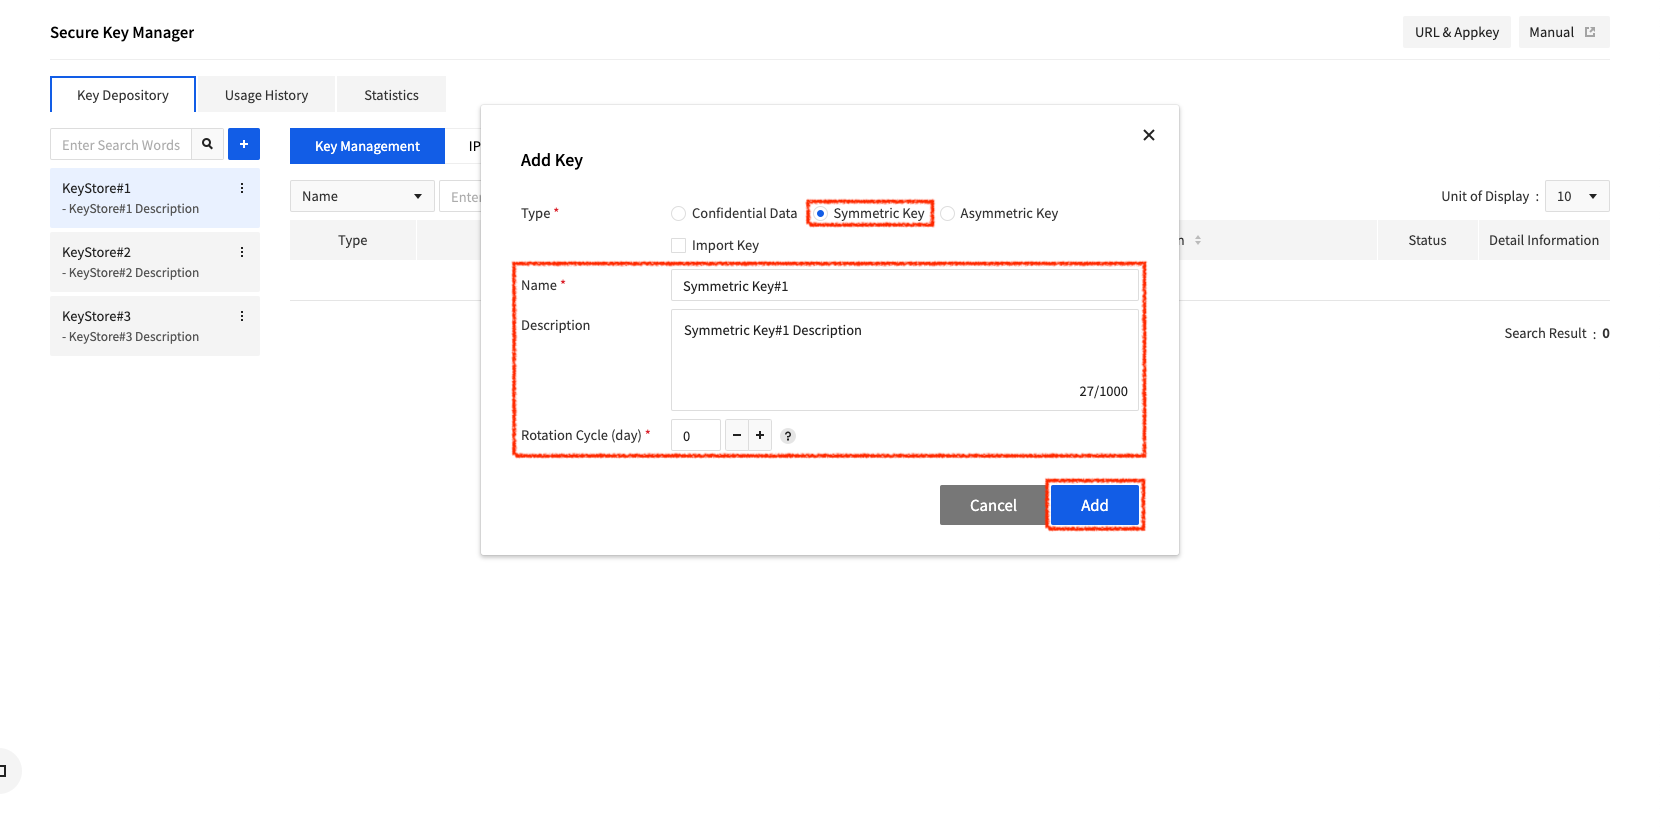
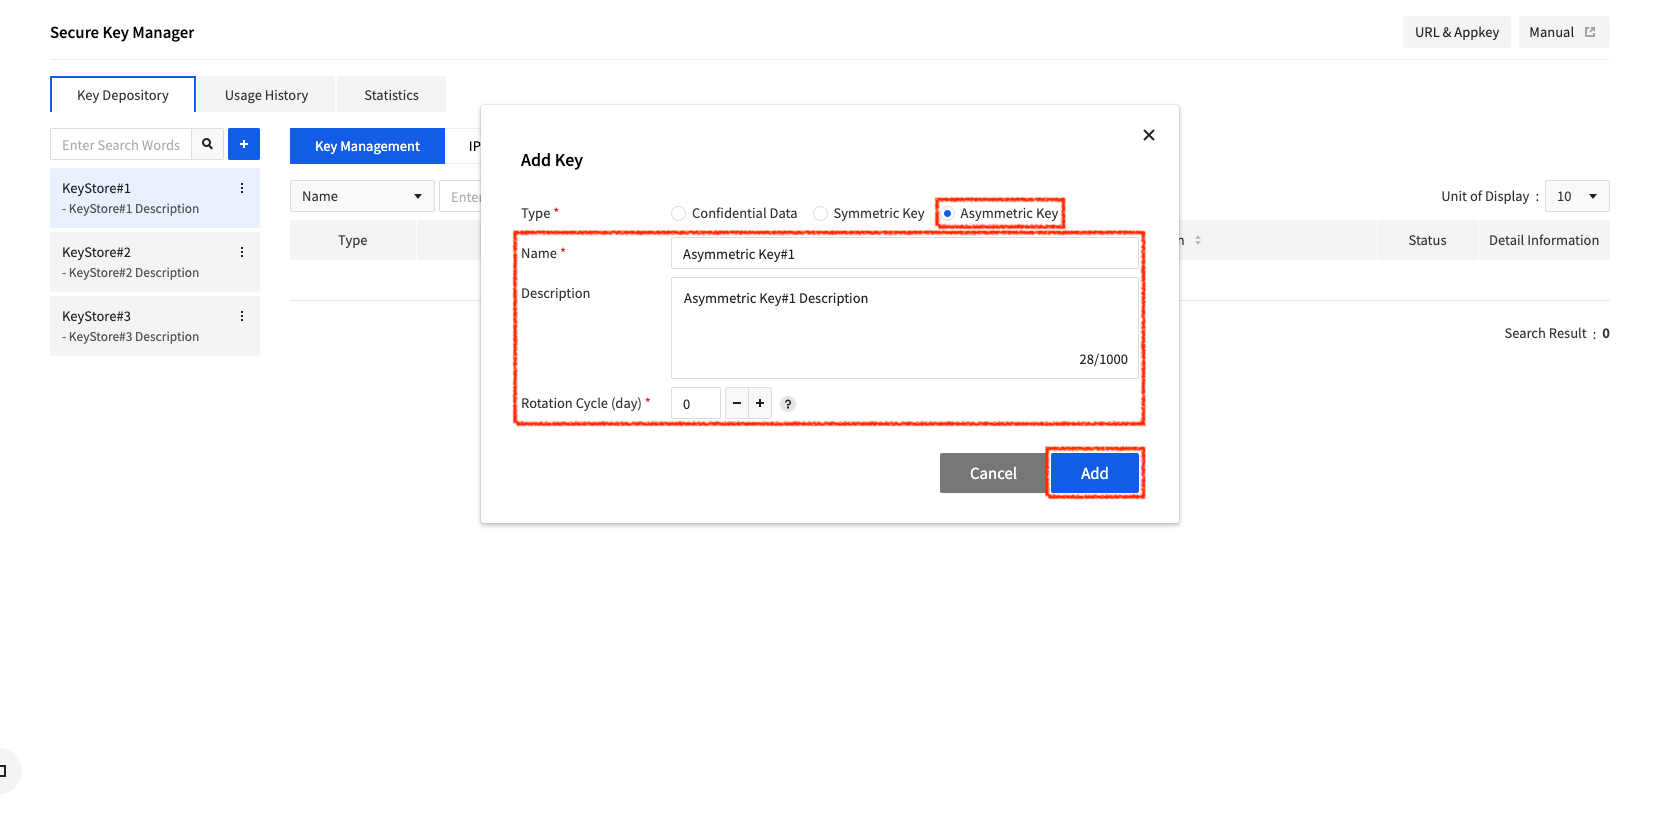
If you select Confidential Data, you can enter name, description, and data. If you select Symmetric Key or Asymmetric Key, you can enter name, description, and rotation cycle. After entering required data, click Add and a key is created. Then, the created key is displayed on the key management page as below:

Import a Key
Secure Key Manager supports a feature to import a symmetric key (AES-256).
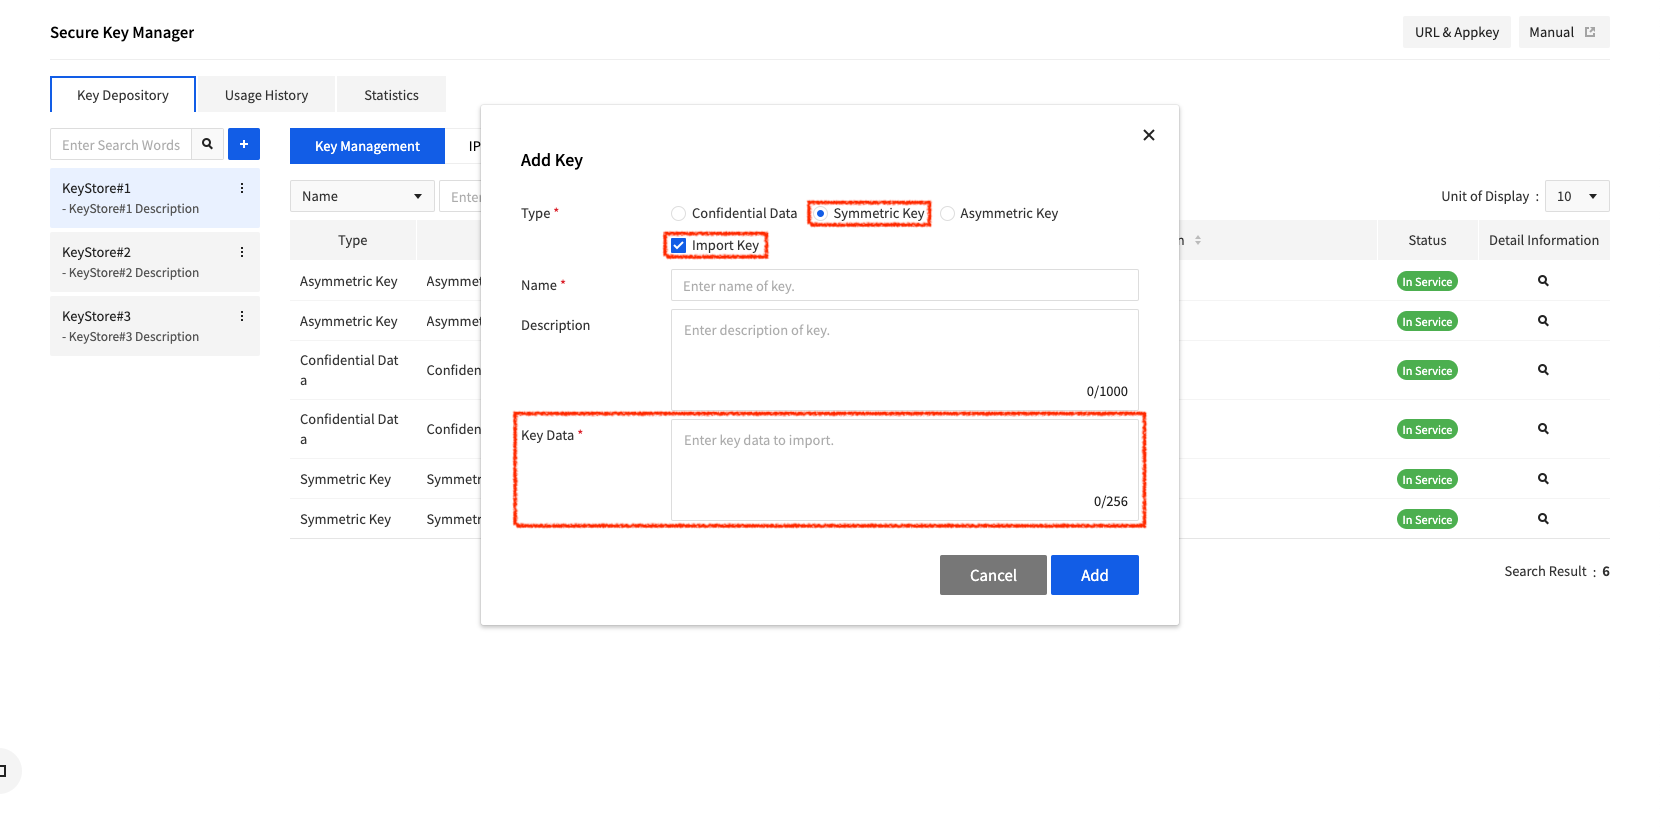
You can upload a key by entering a key value in the Key Data area, and the format of key that can be uploaded is as follows.
0xXX, 0xXX, ..., 0xXX
Upload the key by entering 32 hexadecimal strings separated by comma (,) or space () used as delimiters, as shown above.
Register Authentication Information
Keys that are created in Secure Key Manager are available only for successfully authenticated clients. You may register authentication information for client authentication from the menu of IPv4 Address Management, MAC Address Management, and Certificate Management.
Register IPv4 Address
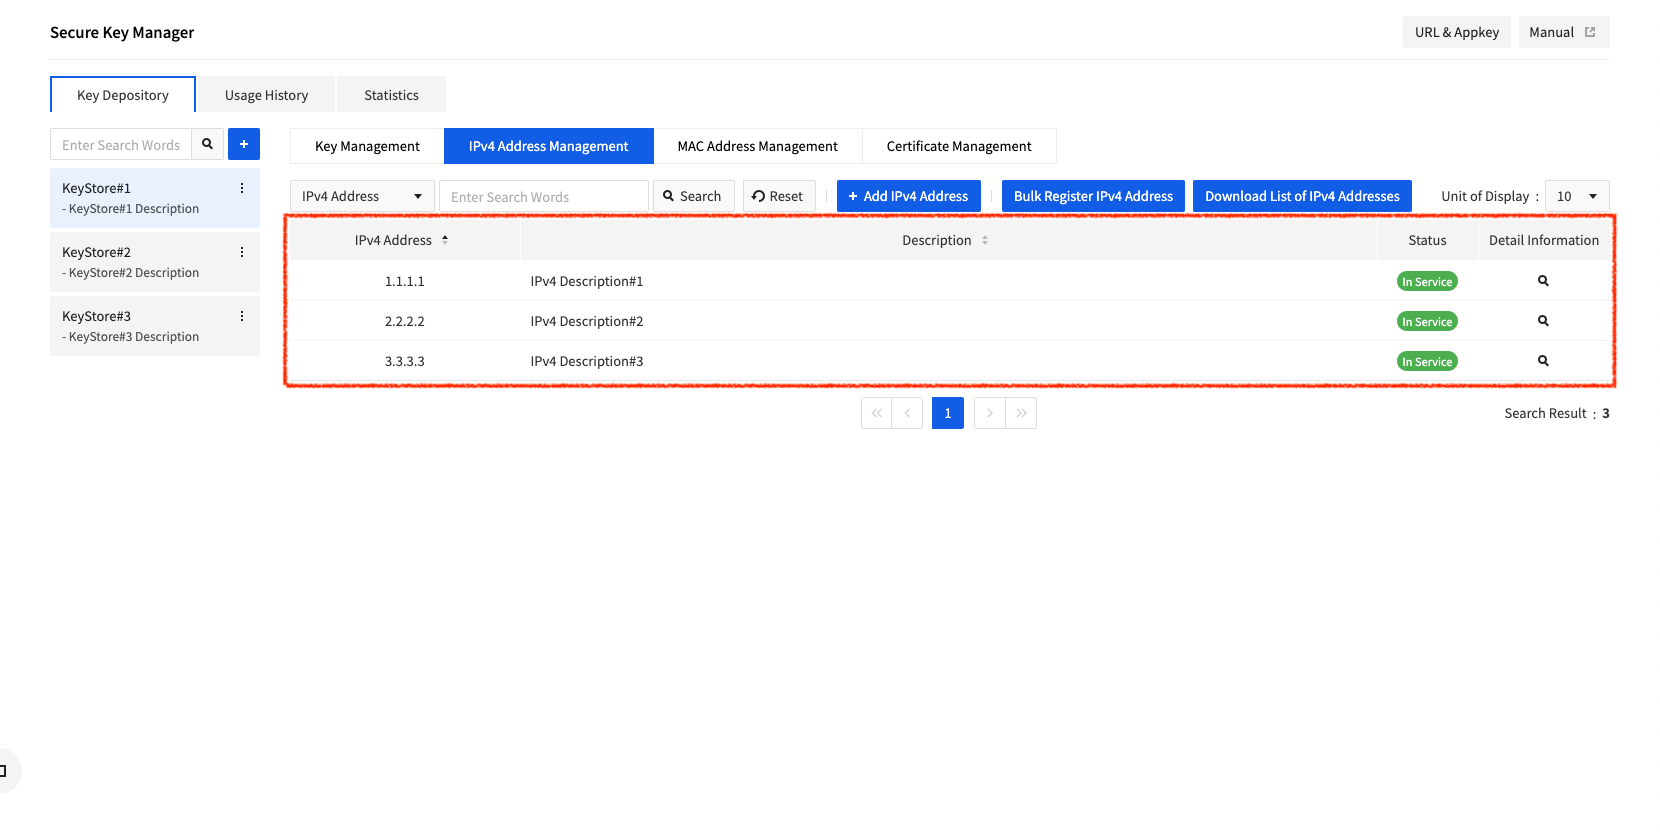
Click IPv4 Address Management, and a page to manage IPv4 address for client authentication shows up.
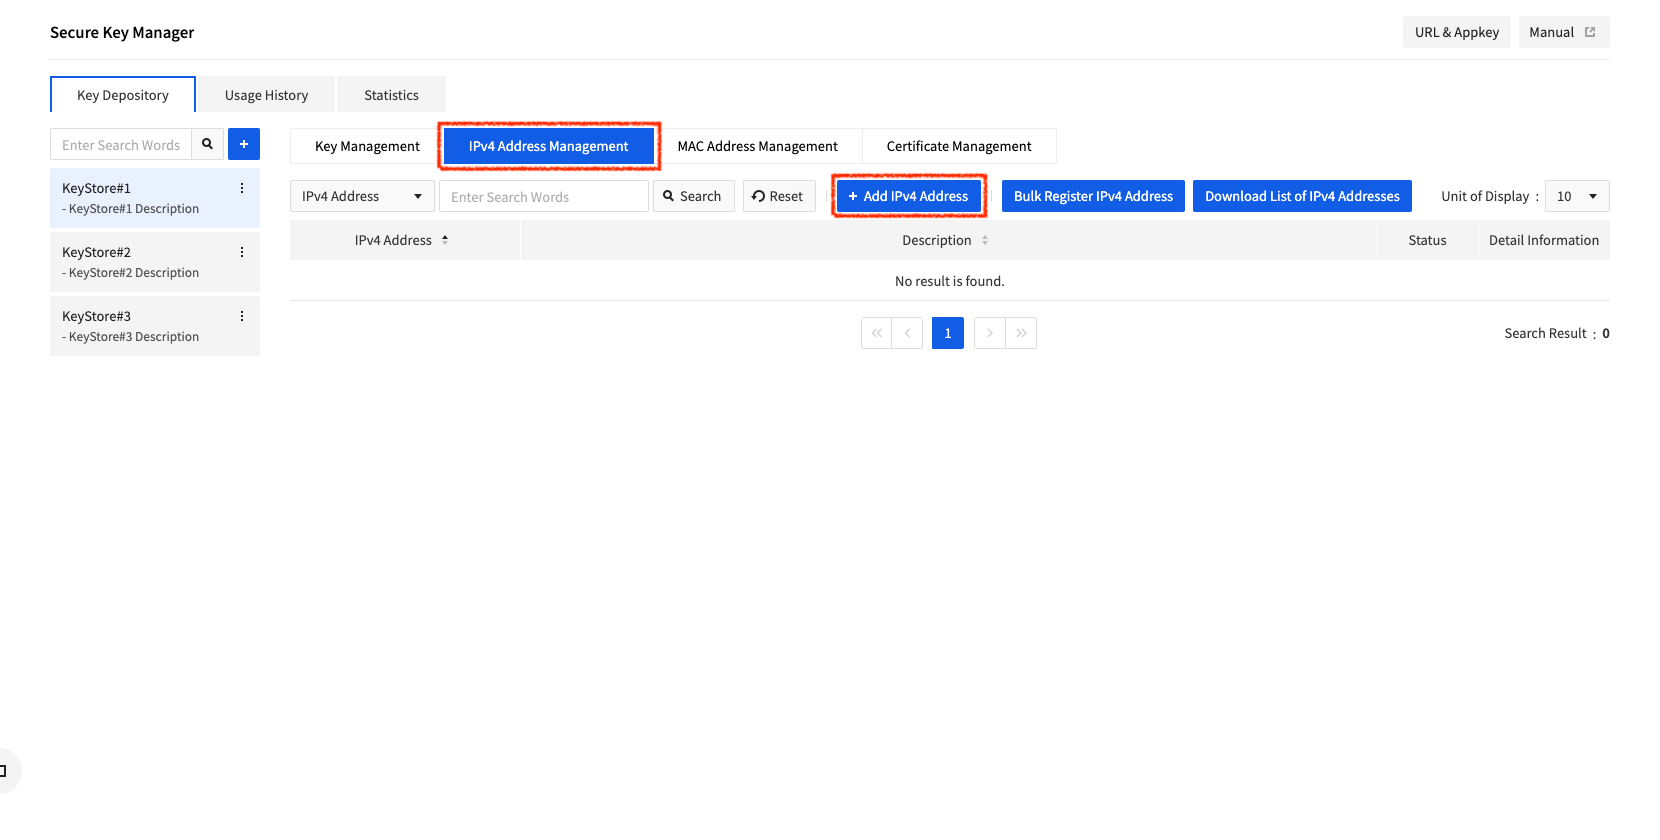
Click Add IPv4 Address, and a window to add IPv4 address shows up as below:
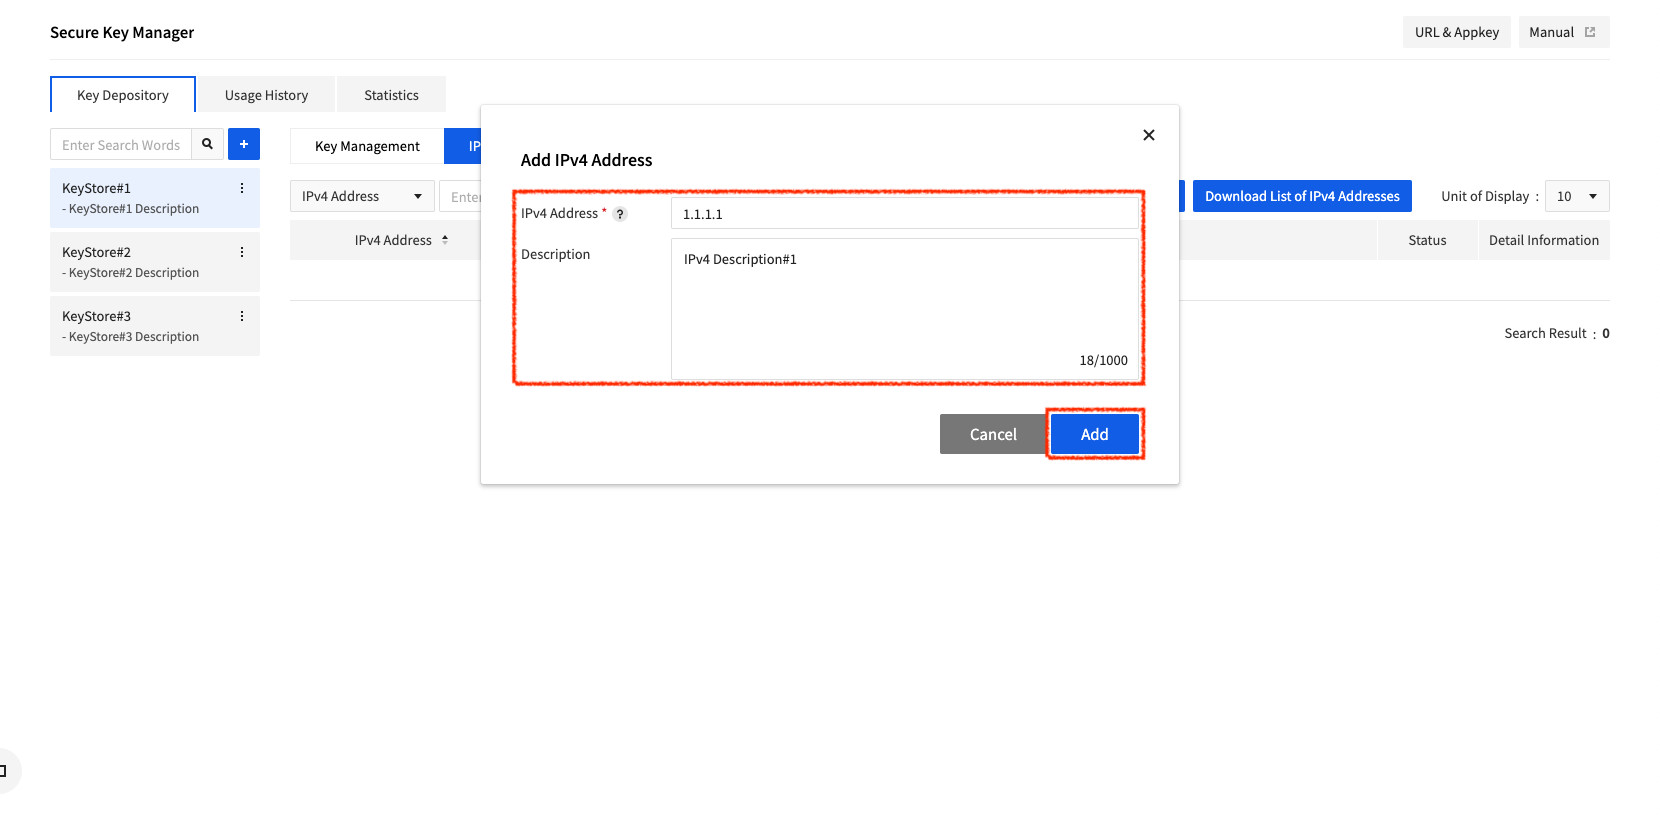
You can register not just IPv4 in the IP format and also IPv4 band using CIDR notation.
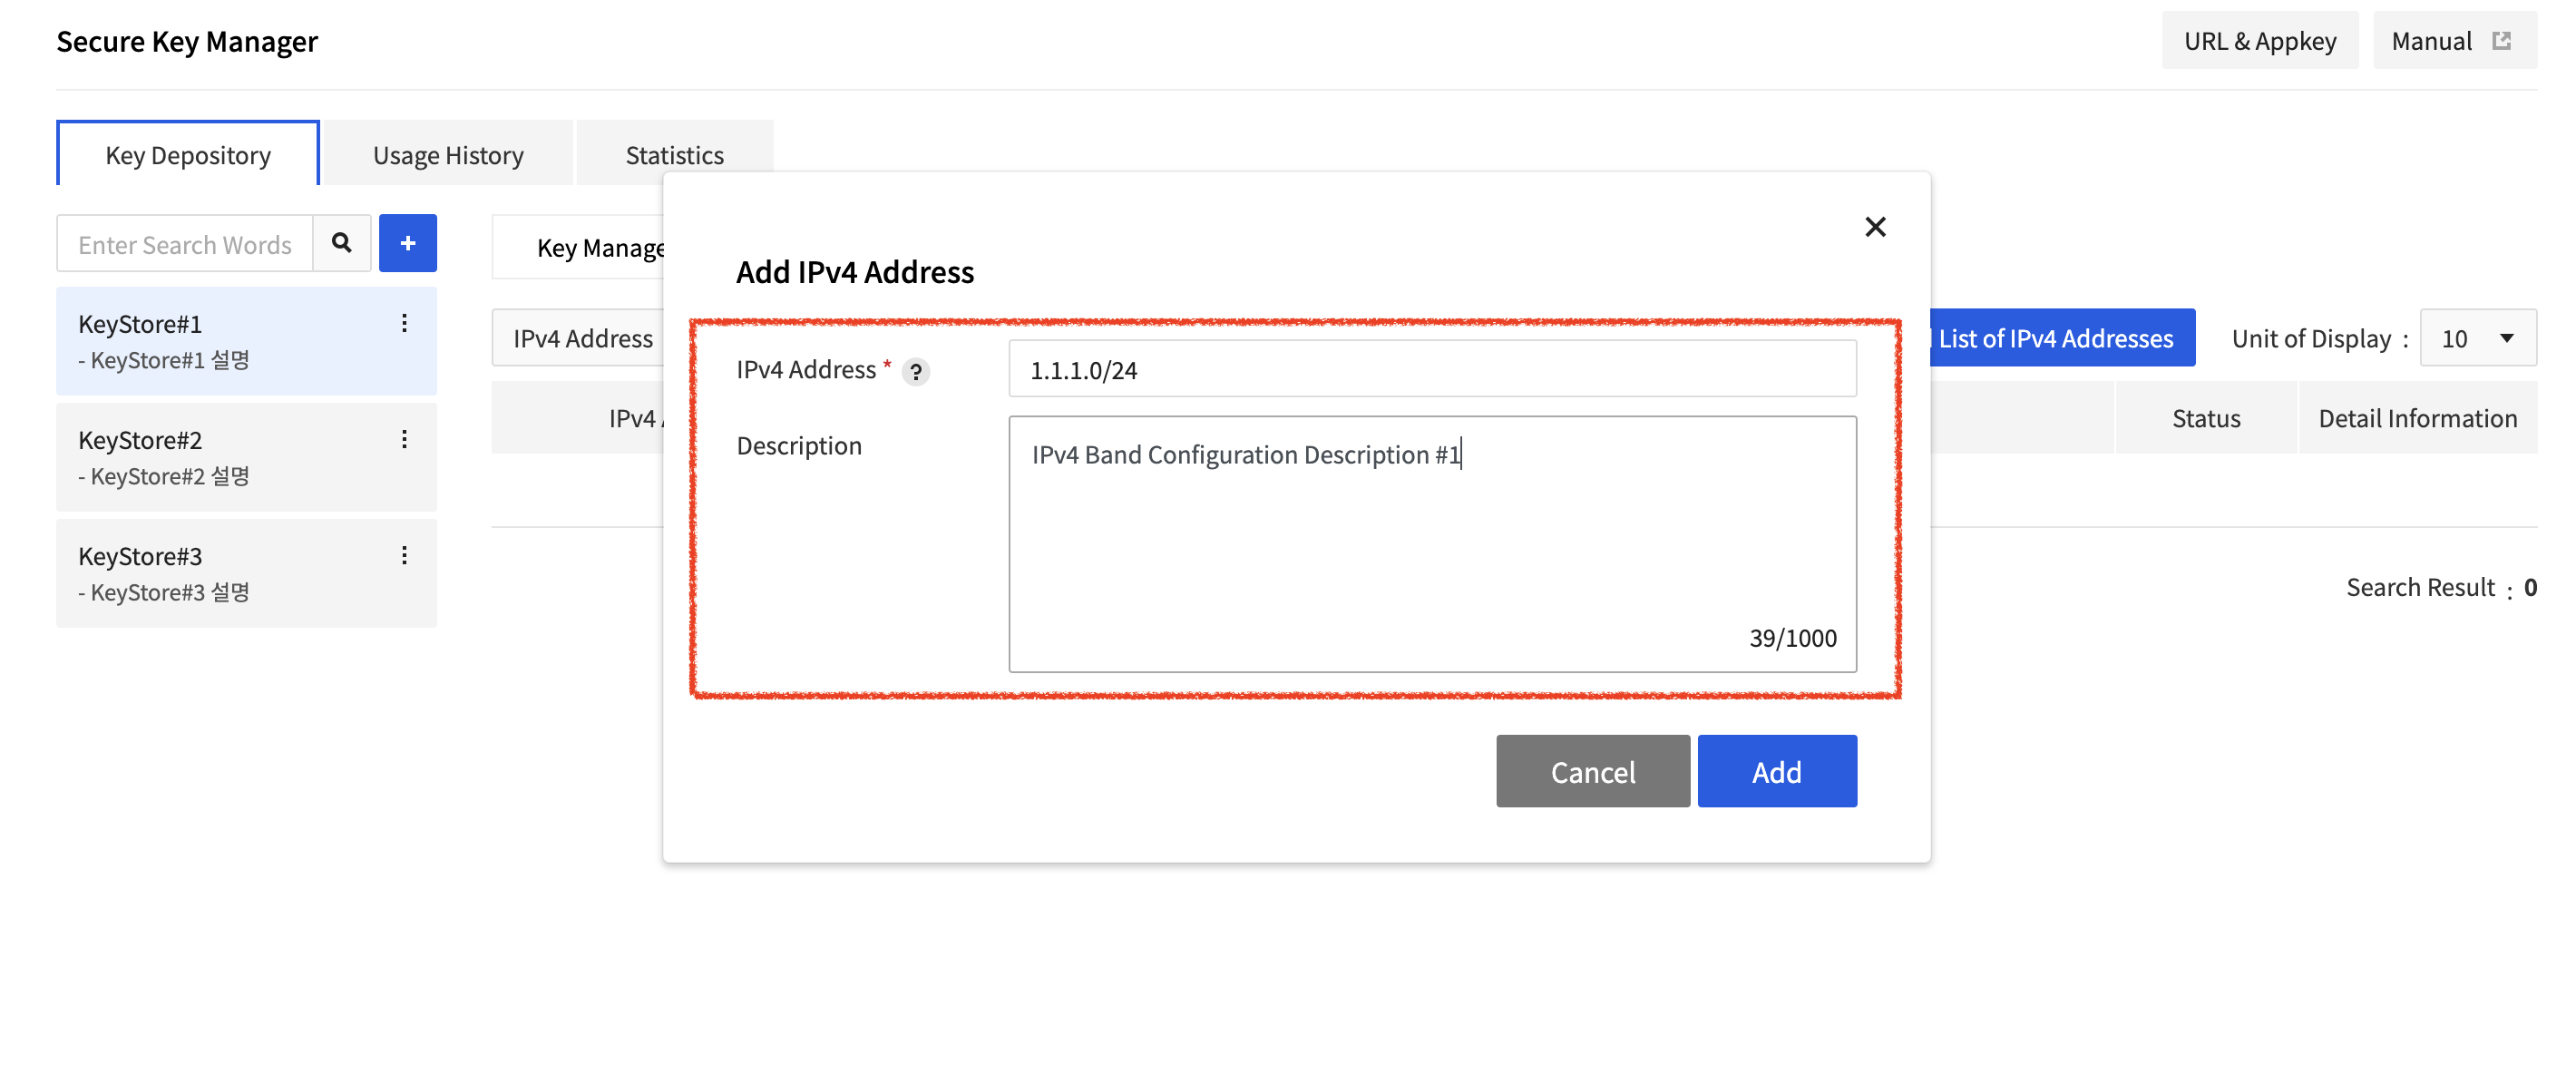
Enter client IPv4 address and description, and click Add, then the IPv4 address is added. Note that such IPv4 address must be same as the address that clients use to access Secure Key Manager. The newly added address is displayed on the IPv4 address management page.
Register MAC Address
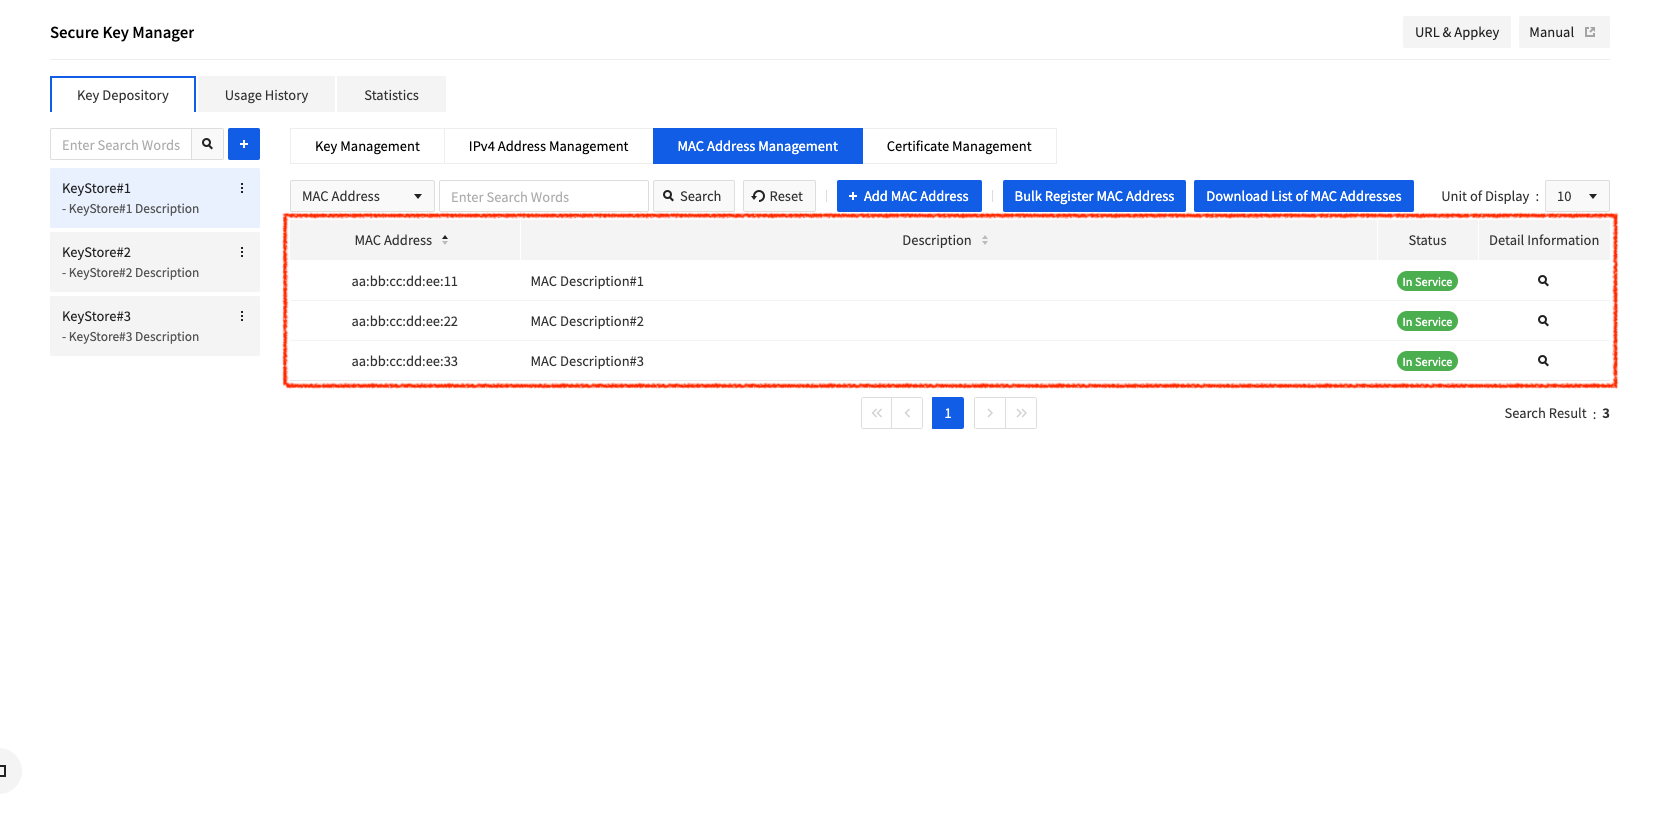
Click MAC Address Management, and the MAC address management page for client authentication shows up.
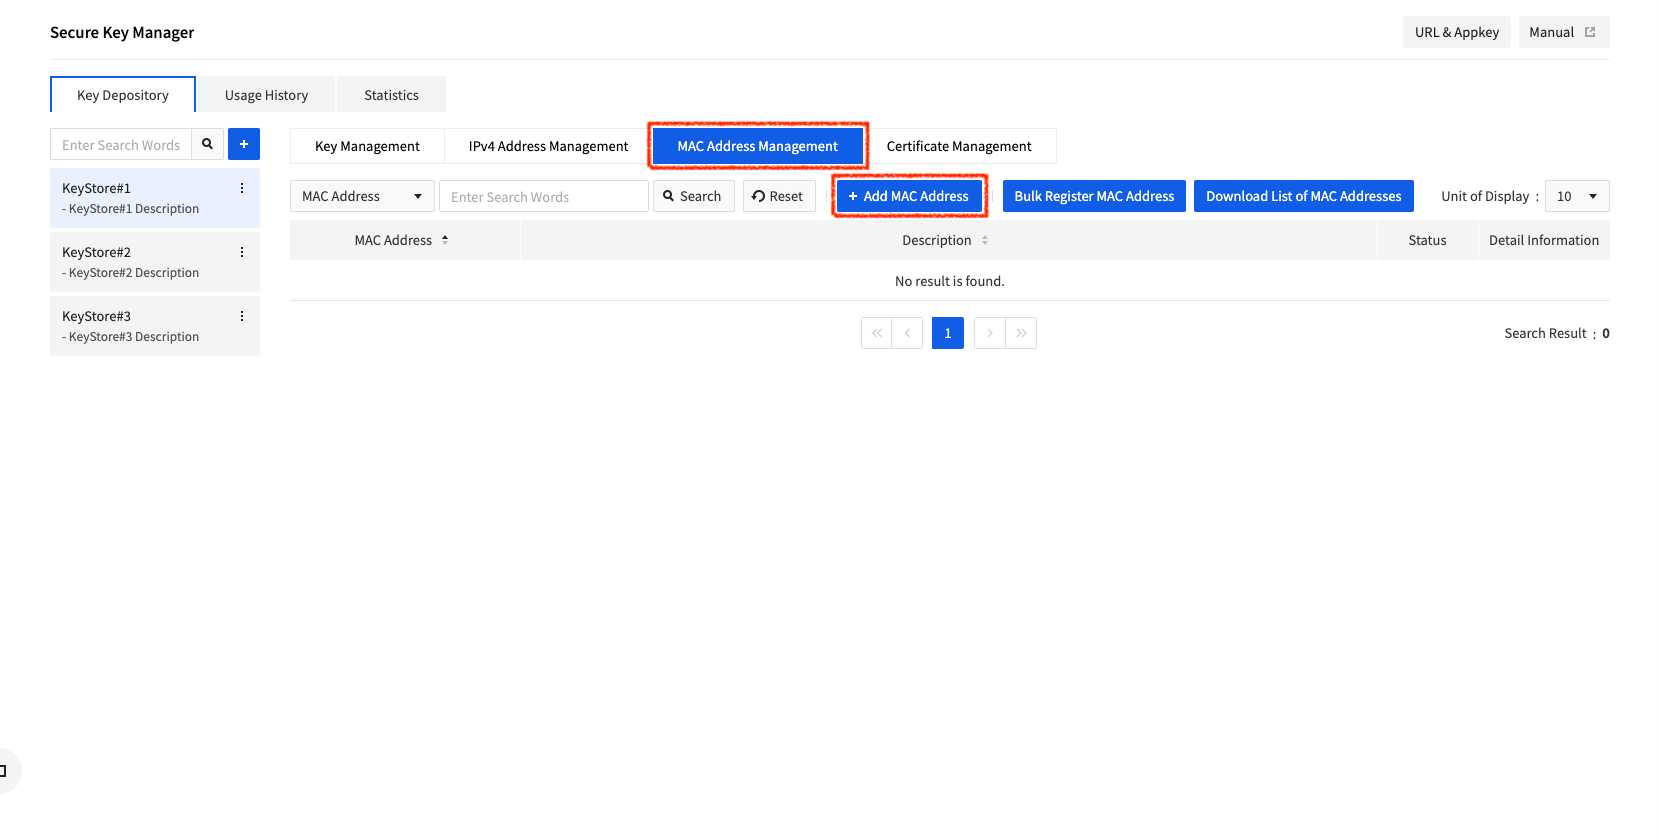
Click Add MAC Address, and a window to add MAC address shows up.
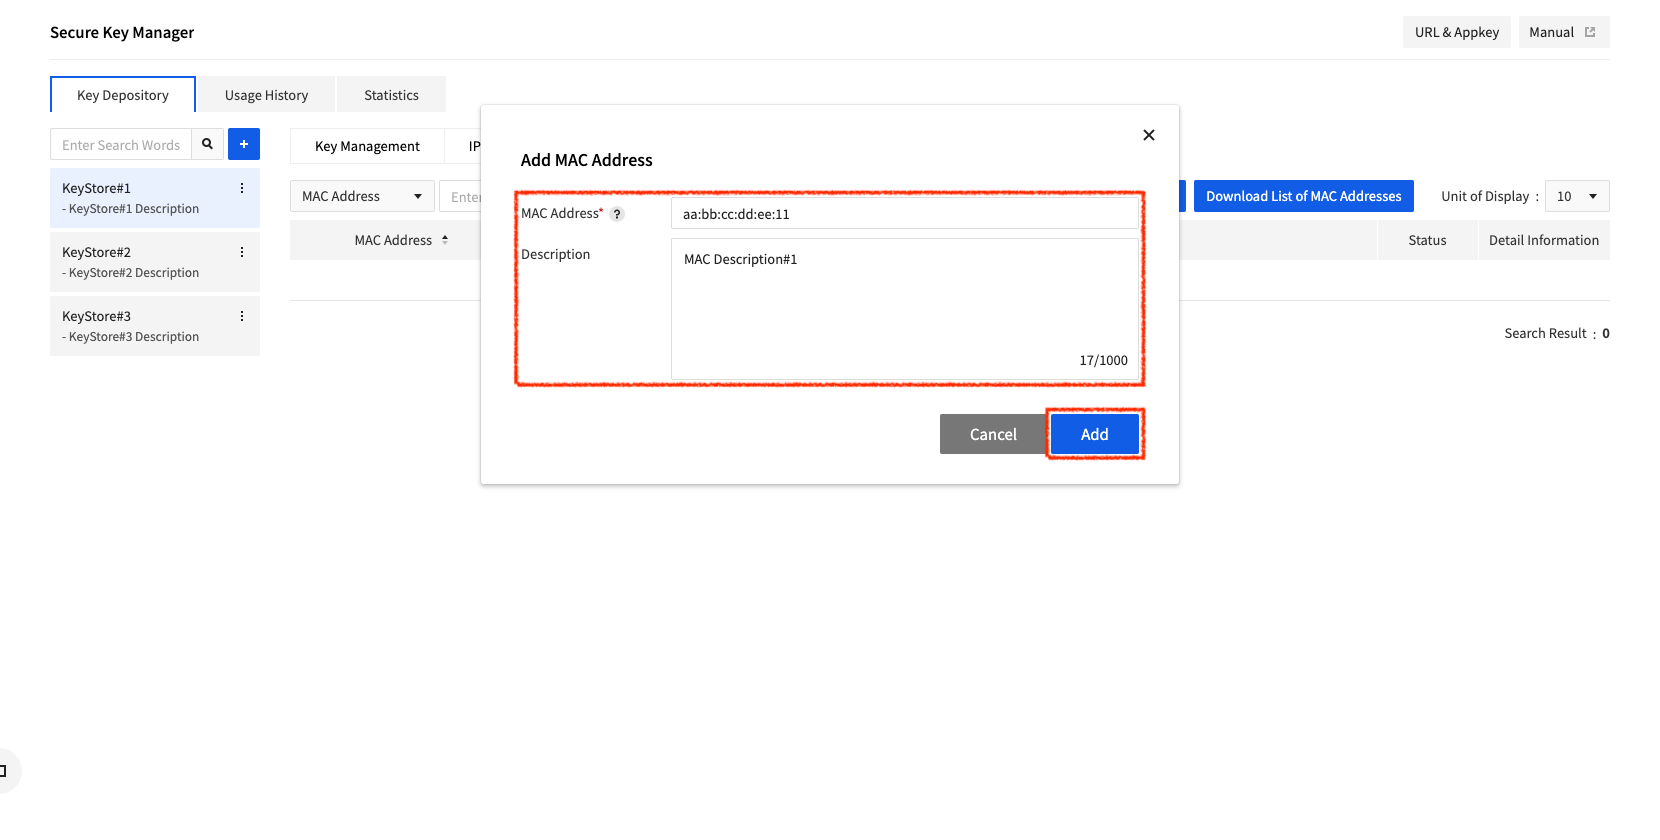
Enter Client MAC Address and description, and click Add, then the MAC address is added. The newly added MAC address shows up on the MAC address management page.
Register Client Certificates
Click Certificate Management, and the certificate management page for client authentication shows up.
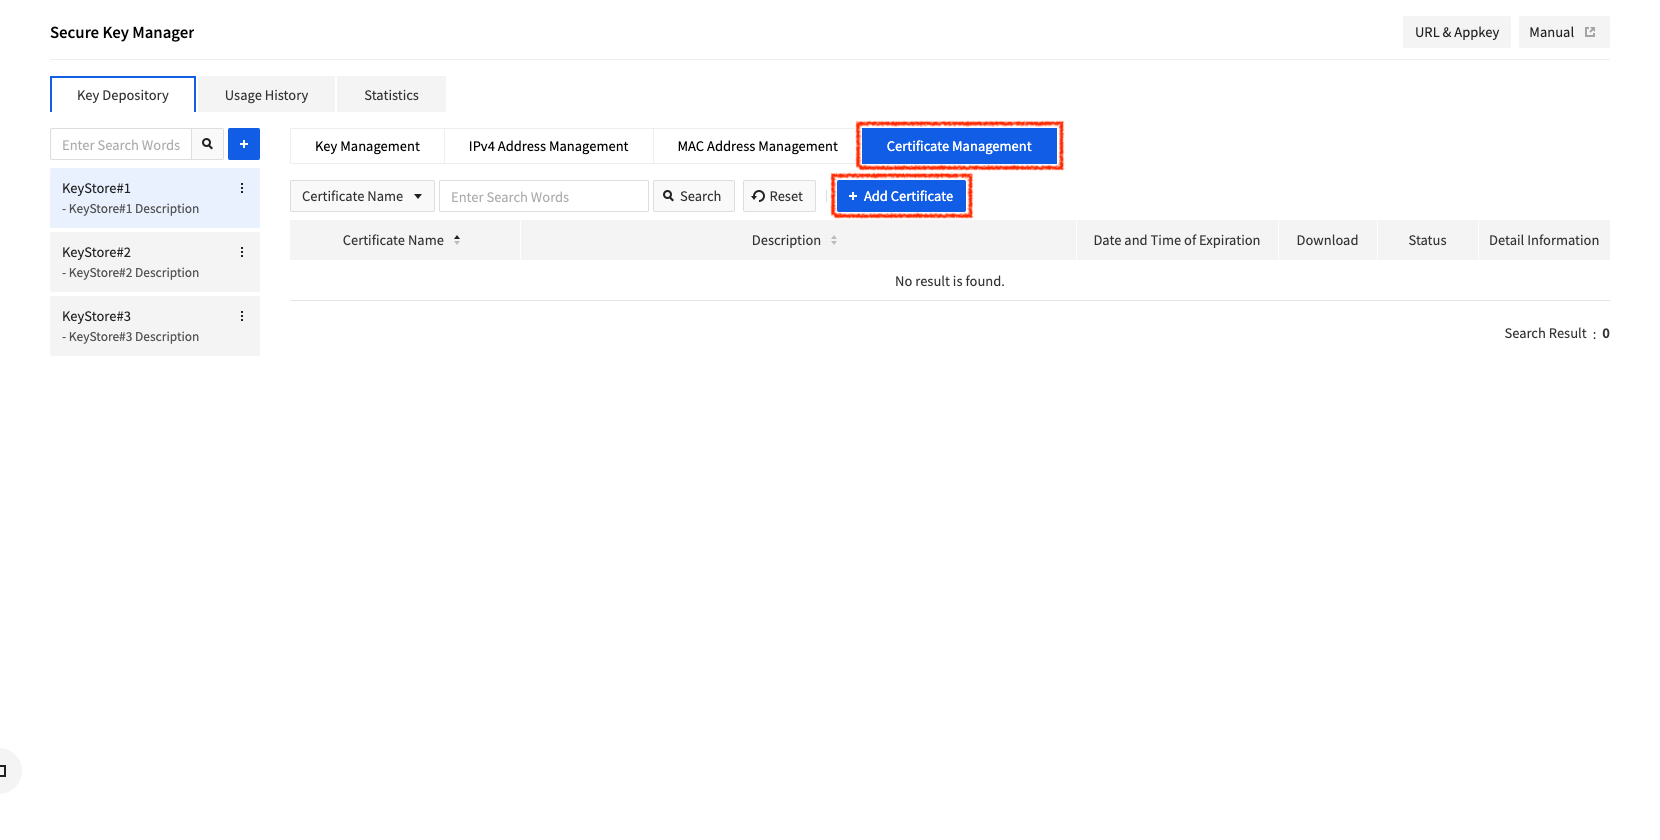
Click Add Certificates, and a window to create a certificate shows up.

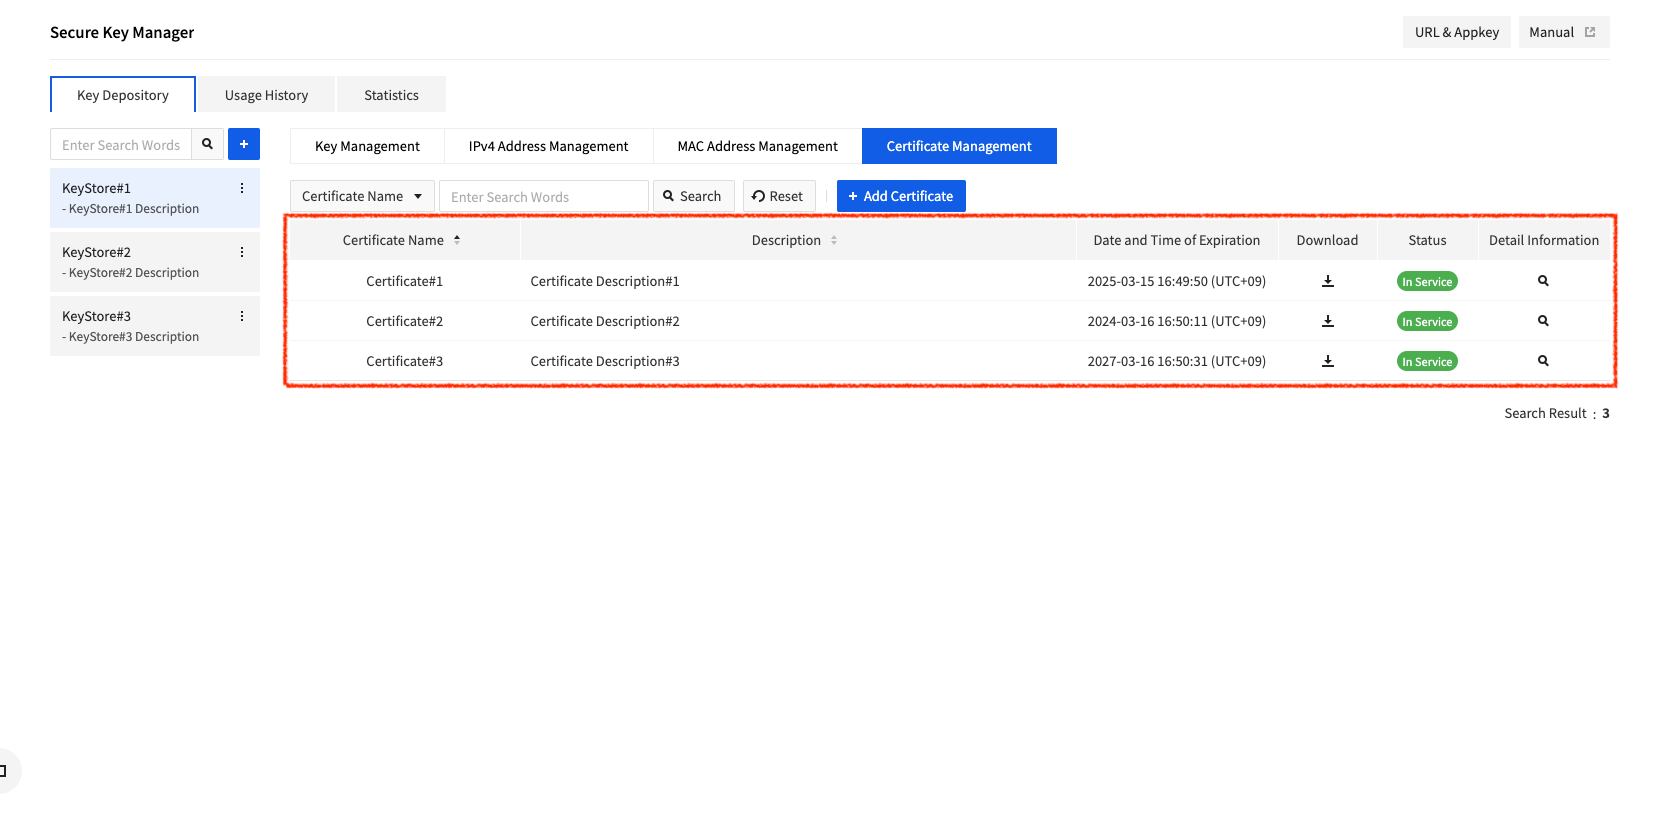
Enter certificate name, password, and description, select usage period, and click Add, then a certificate is created. The newly created certificate shows up on the certificate management page like below. If you click the Download icon in the certificate management page, the certificate file is downloaded.
Manage User Data
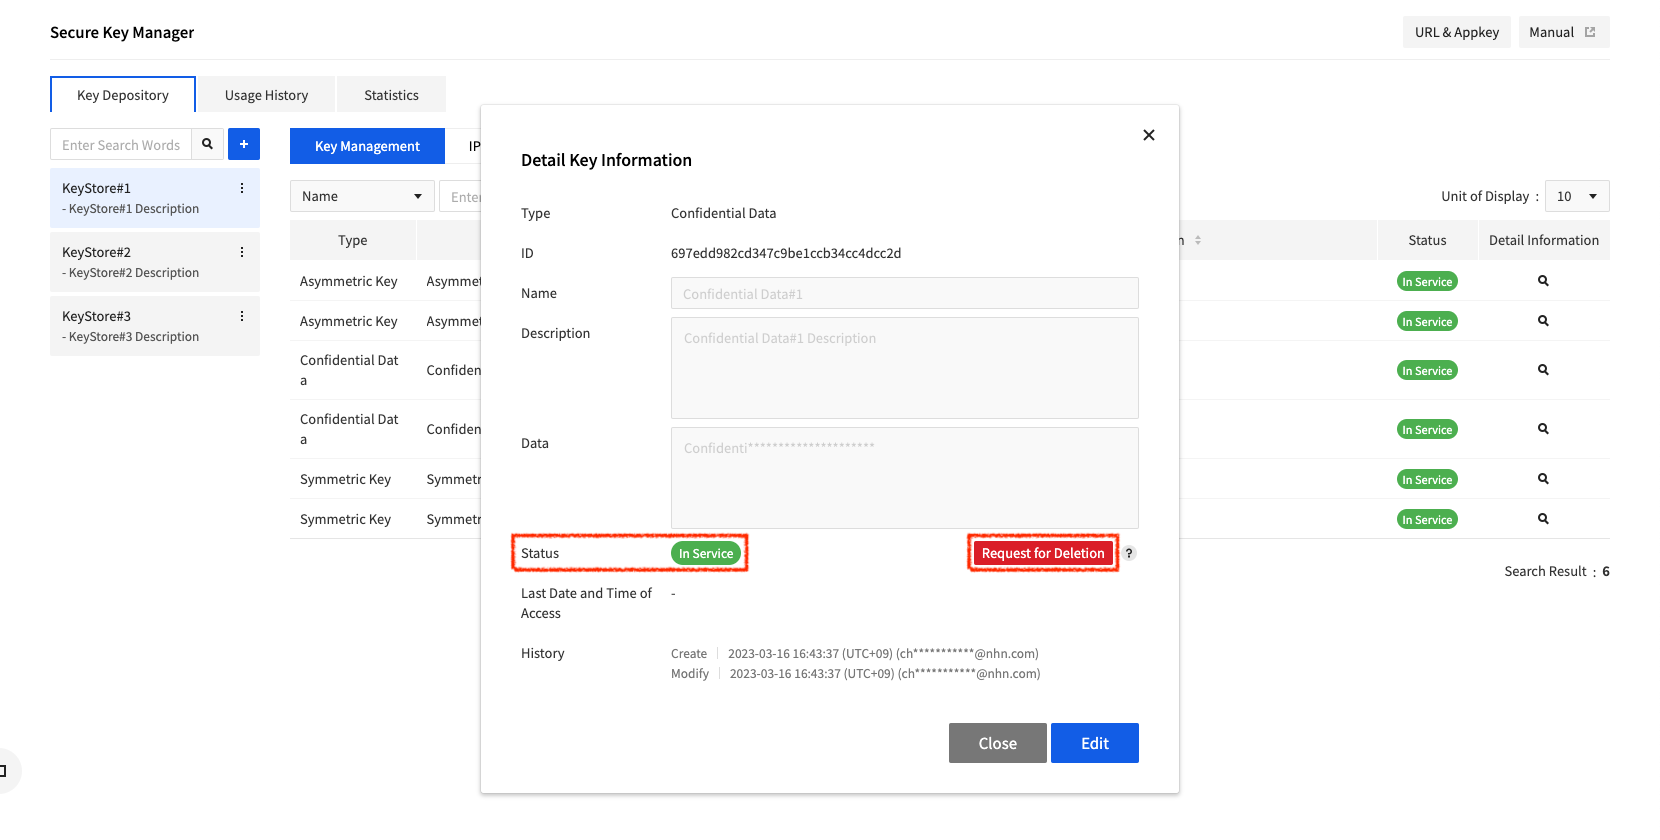
Secure Key Manager provides detailed information on user-created data (e.g. key or authentication information). Click Detail Key Information on the list of user data, and details are displayed like below:
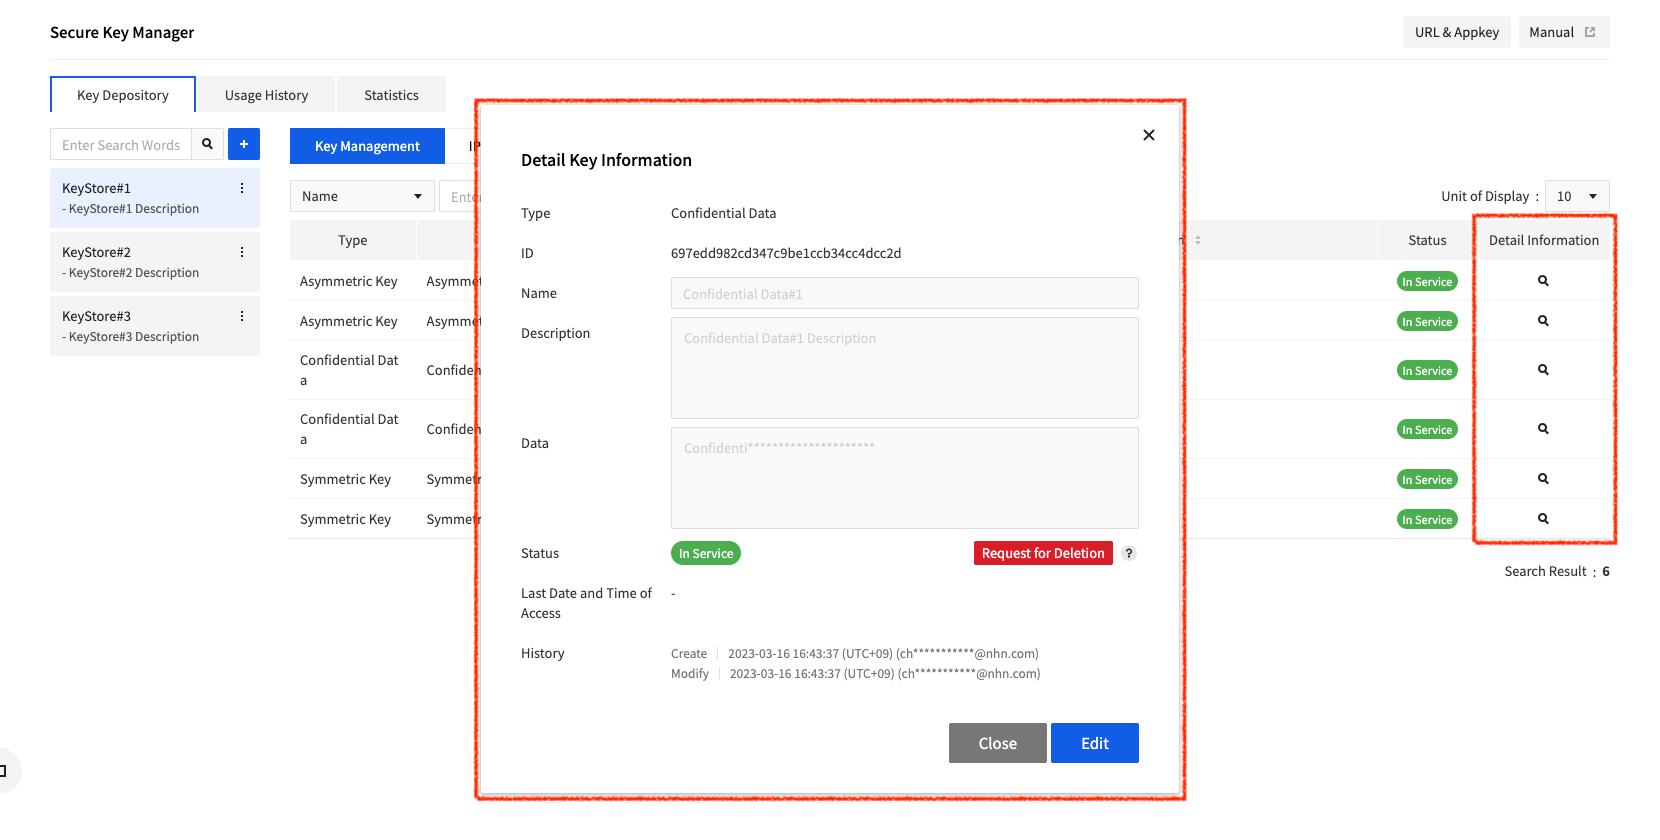
Delete User Data
The initial status of user-created data is In Service. To delete unnecessary data, click Request for Deletion in the Detail Key Information window.
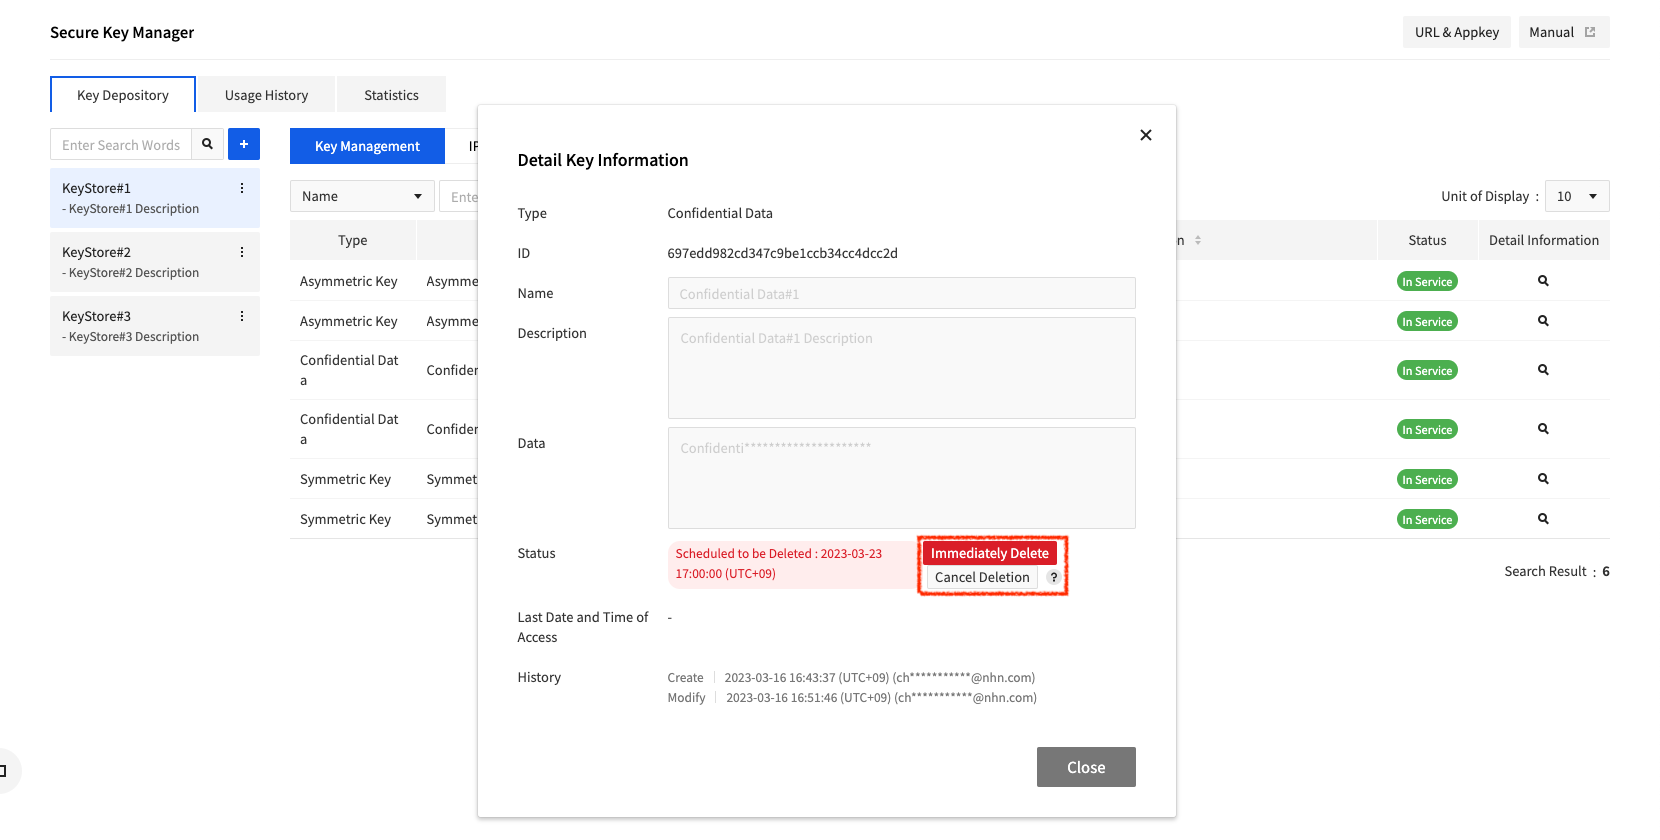
Once requested for deletion, the data status is changed to Scheduled to be Deleted. Data in Scheduled to be Deleted status becomes unavailable and it is completely deleted in 7 days.
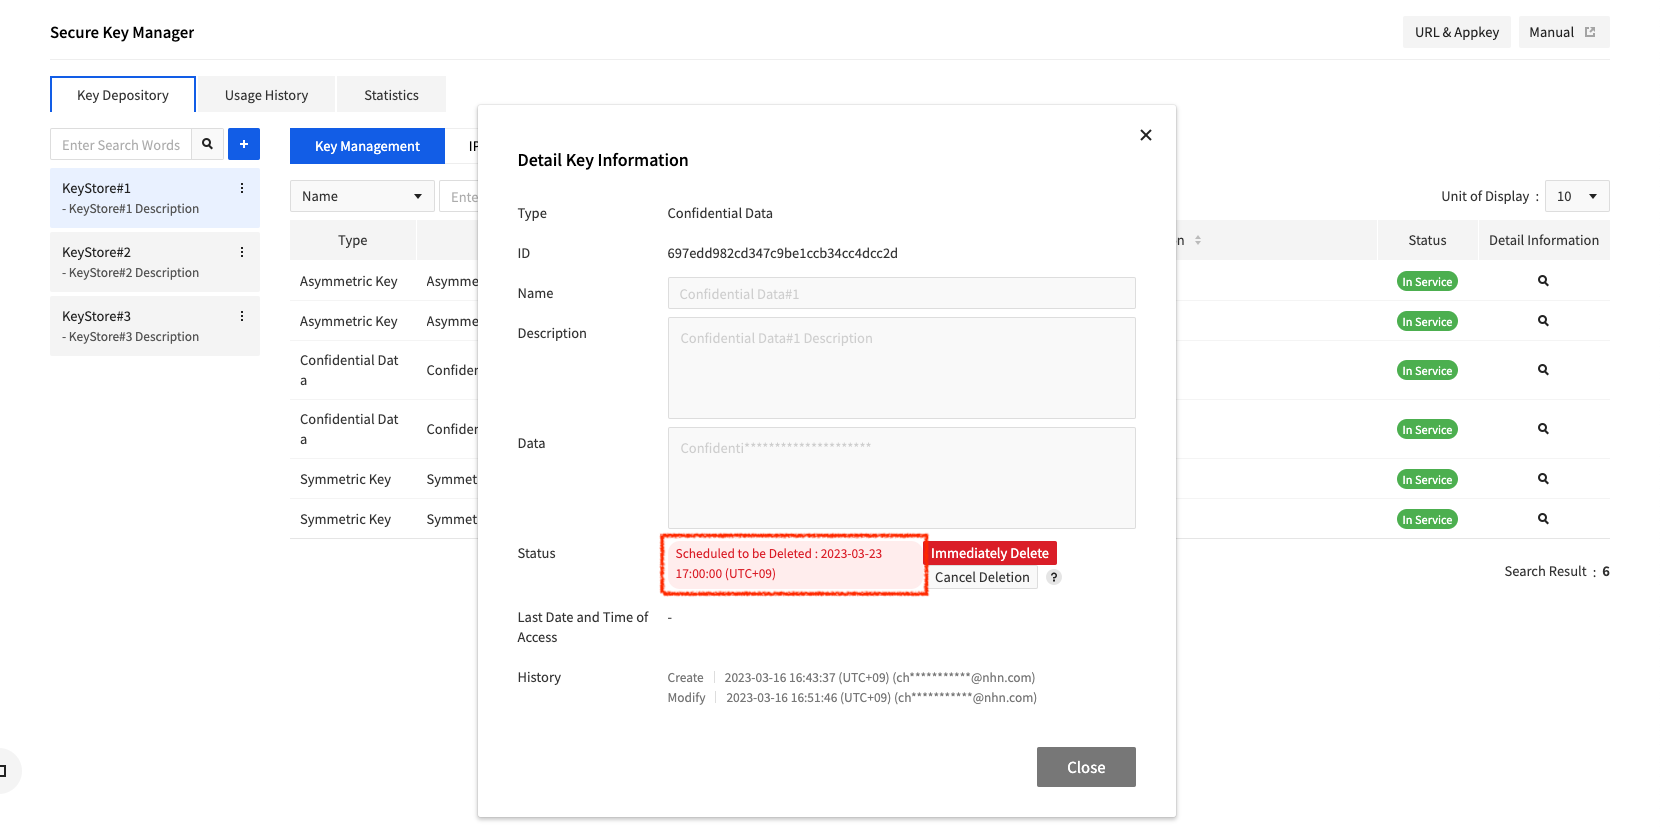
You may click Immediately Delete for data in Scheduled to be Deleted status to delete the data without having to wait until the scheduled deletion time, or click Cancel Deletion to revert it to In Service status.
Rotate Symmetric/Asymmetric Keys
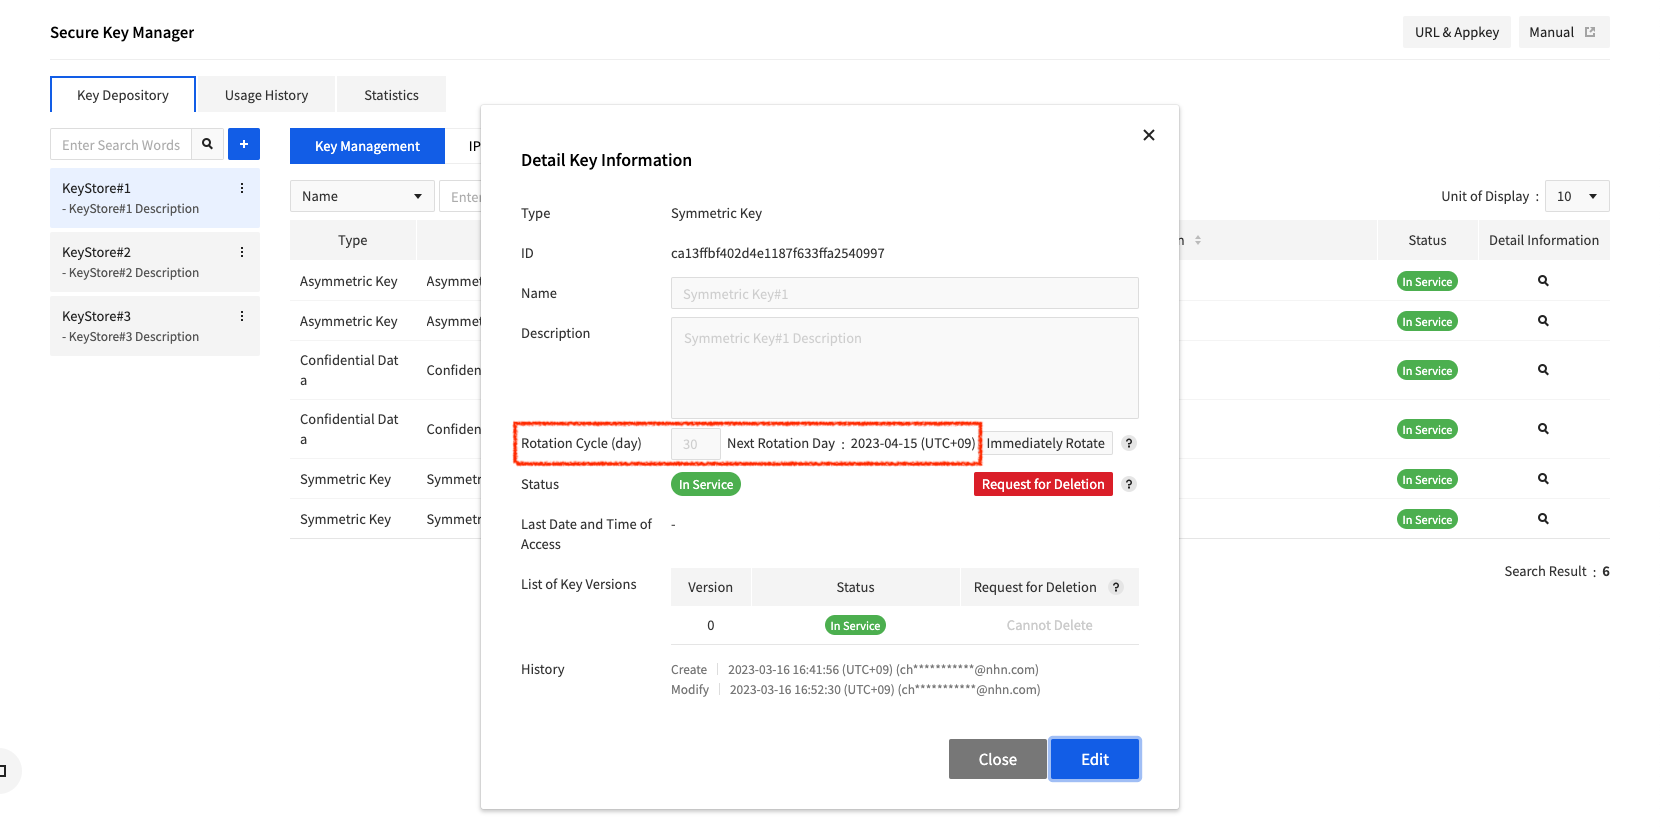
In Secure Key Manager, symmetric/asymmetric keys can be rotated. Like shown below, auto rotation cycle can be set from the details page of Symmetric/Asymmetric Key. If you set the rotation cycle to '0', auto rotation is not enabled.
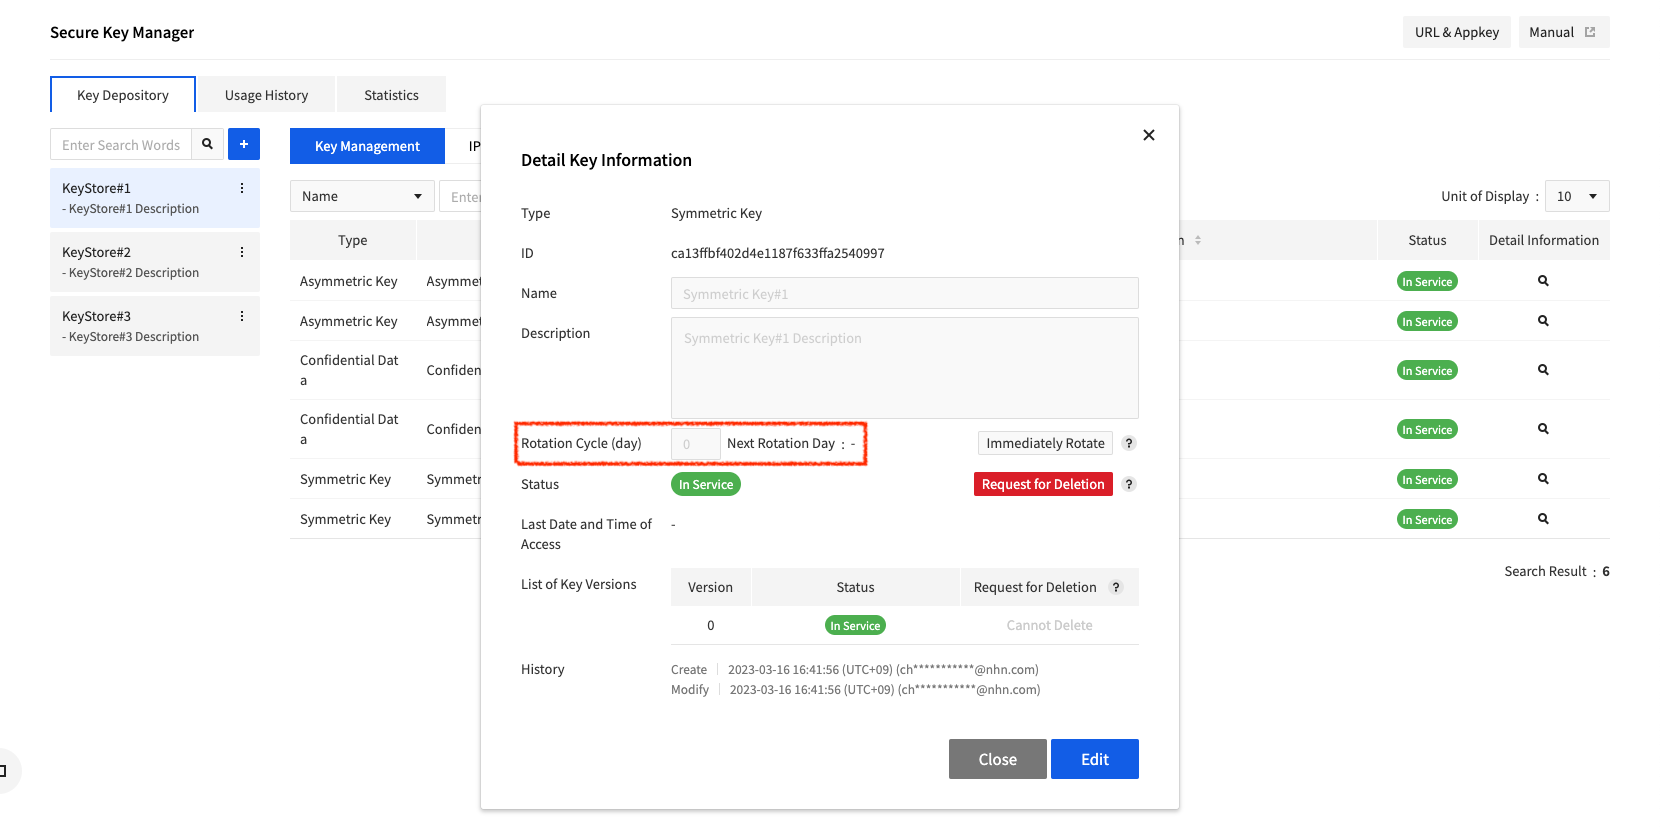
If you set the rotation cycle to 30 or higher, the next rotation date is displayed, and key is automatically rotated at every rotation cycle.
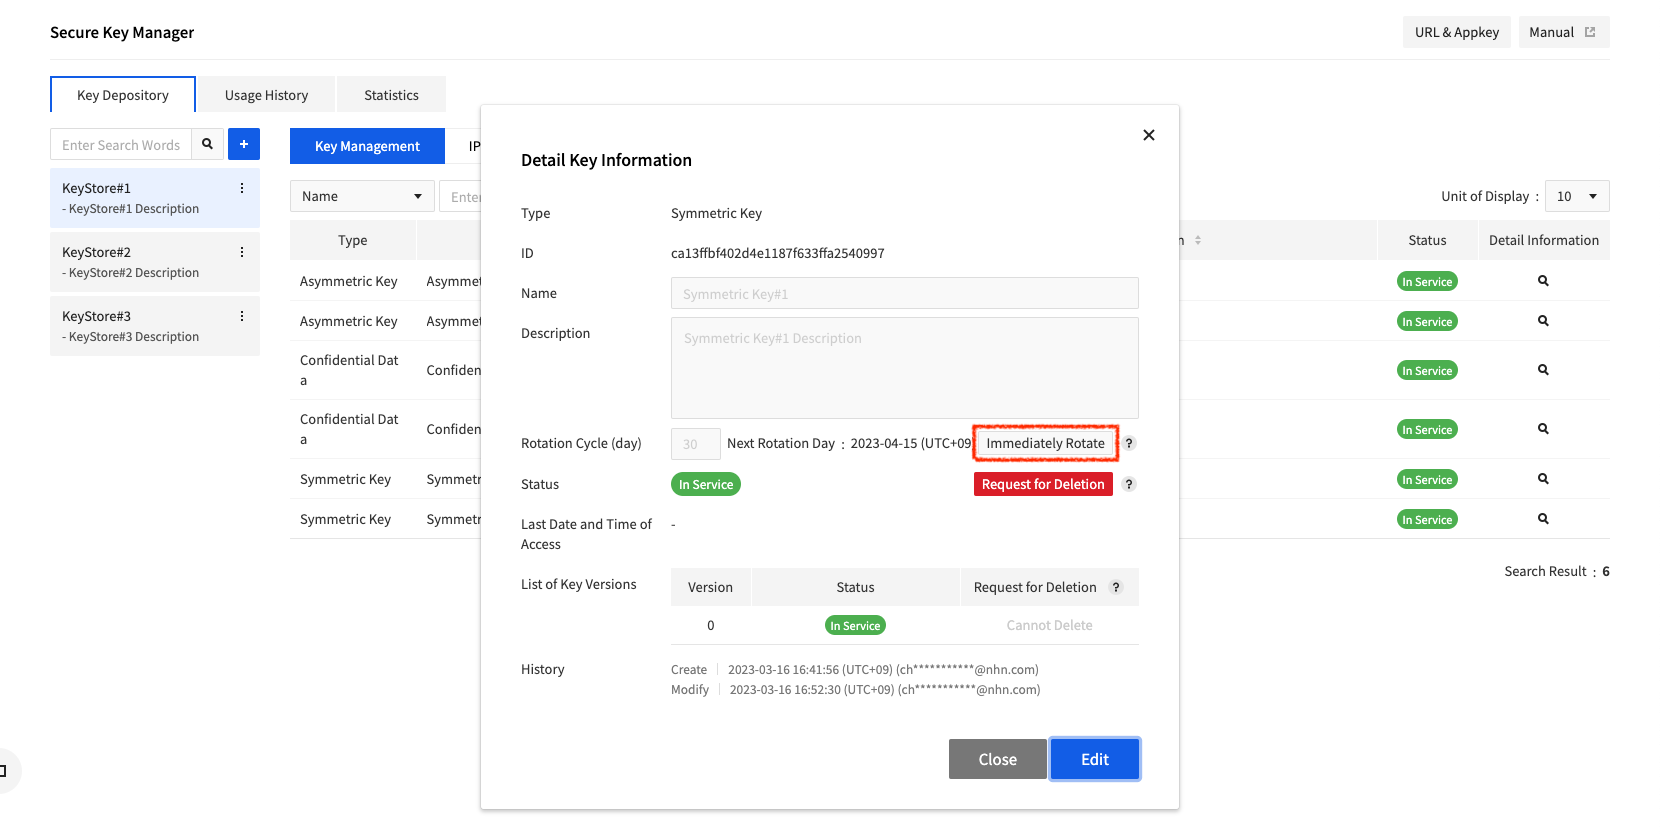
On the Detail Key Information page for Symmetric/Asymmetric Key, click Immediately Rotate to immediately rotate the key.
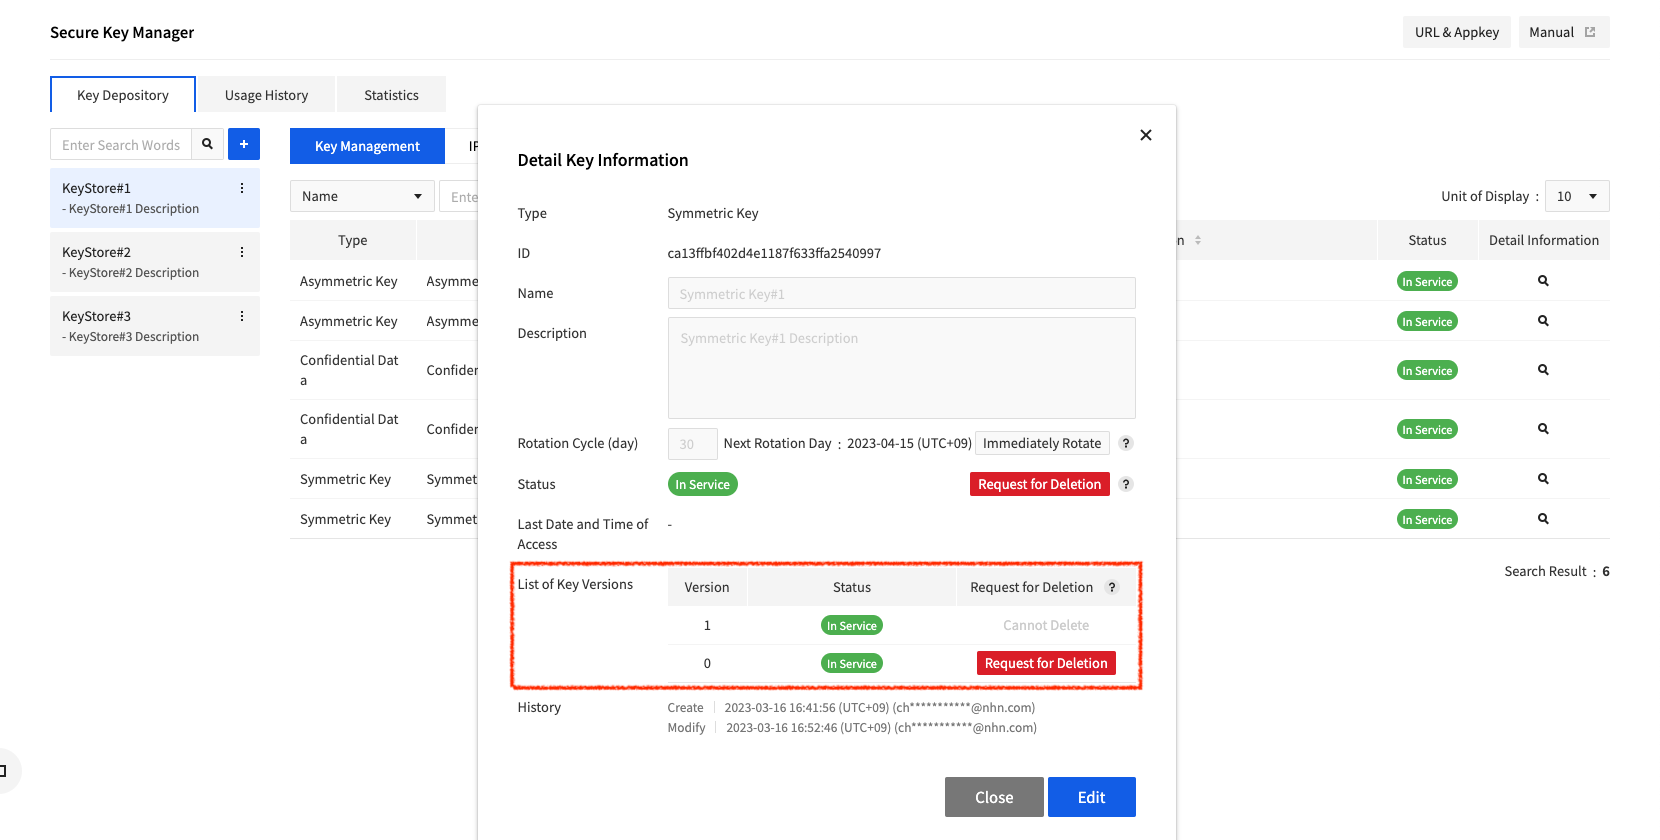
When a key is rotated, a new version is added to the list of key versions, like below:
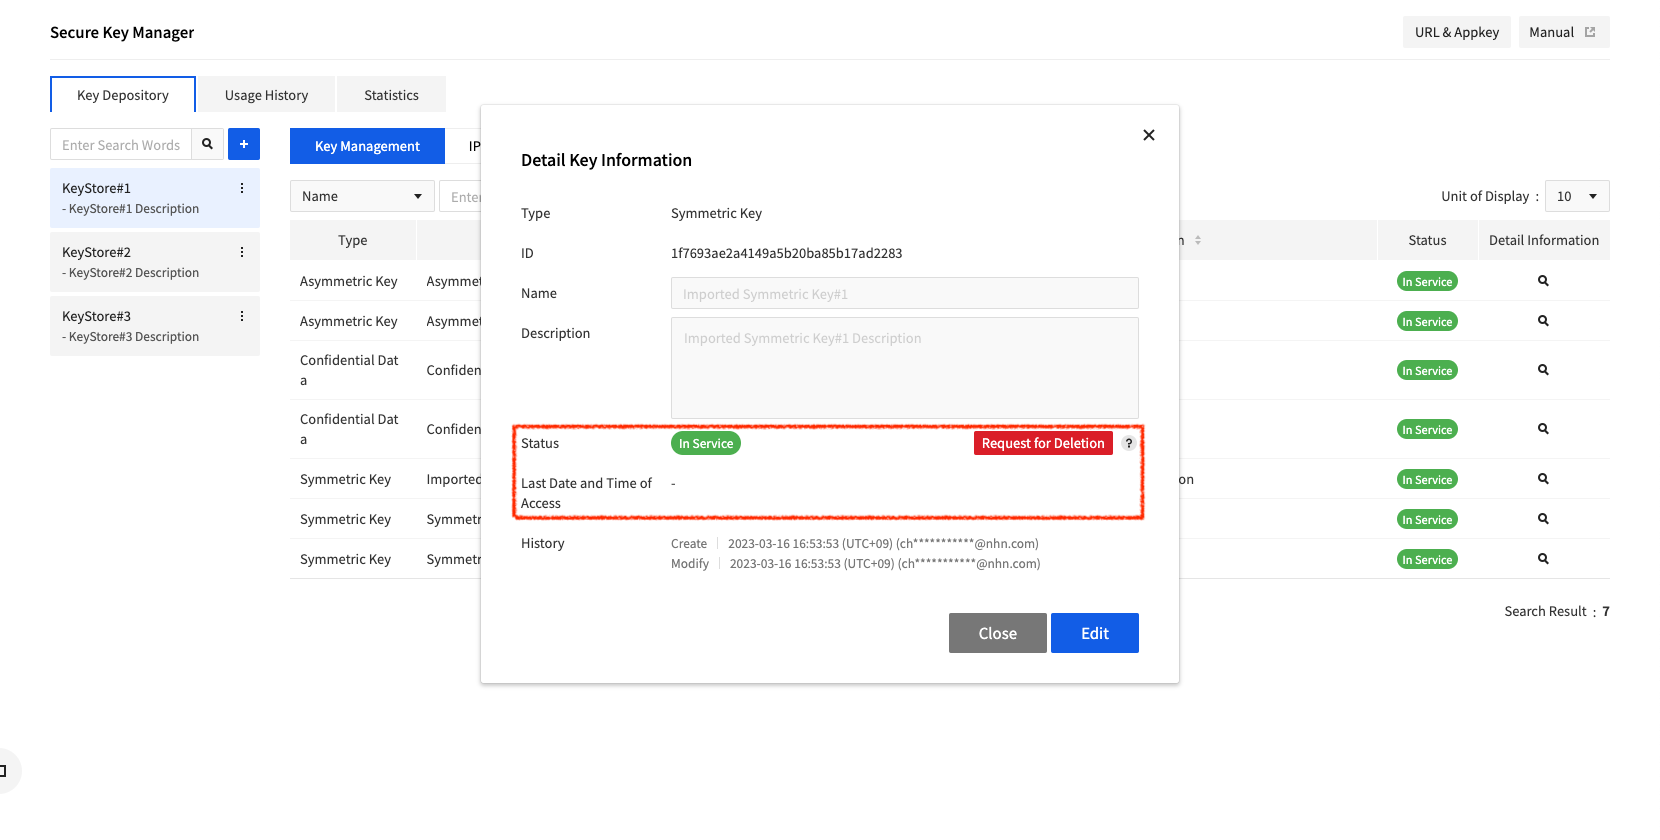
As an exception, keys generated through key import do not provide the key rotation feature, unlike symmetric keys generated by Secure Key Manager. When you query the key, the key rotation area does not exist as shown below:
Authorization for Add/Delete Keys API
Create User Access Key ID, Secret Access Key
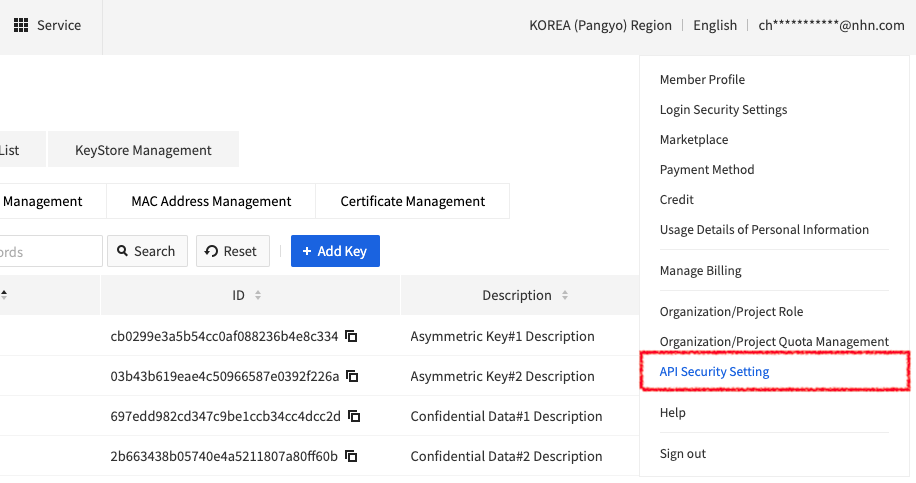
Click the ID area in the upper-right corner of the console to see the API Security Settings menu as follows.
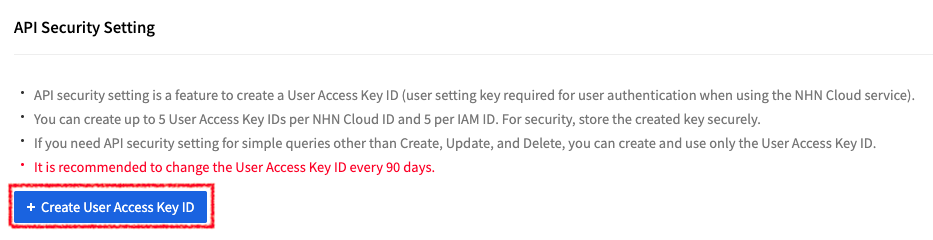
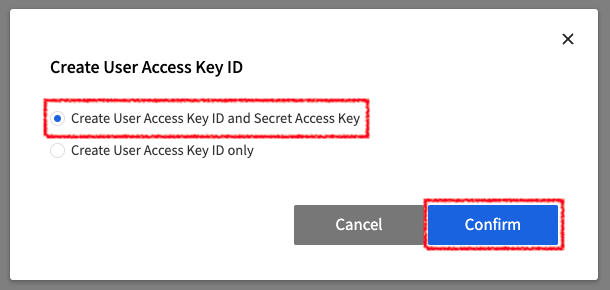
In API Security Setting, you can click Create User Access Key IDto create a User Access Key ID and Secret Access Keythat must be entered into the Secure Key Manager Add/Delete Keys API.
After creating User Access Key ID and Secret Access Key, the Completed to Issue Secret Key screen is displayed as shown below. The secret key is only given to you once in that popup screen, so make sure to keep a good record of this value.
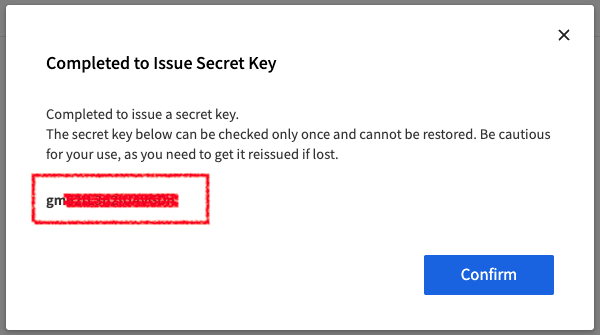
The User Access Key ID, which is required for API requests, can be found by closing the secret key successfully issued popup.
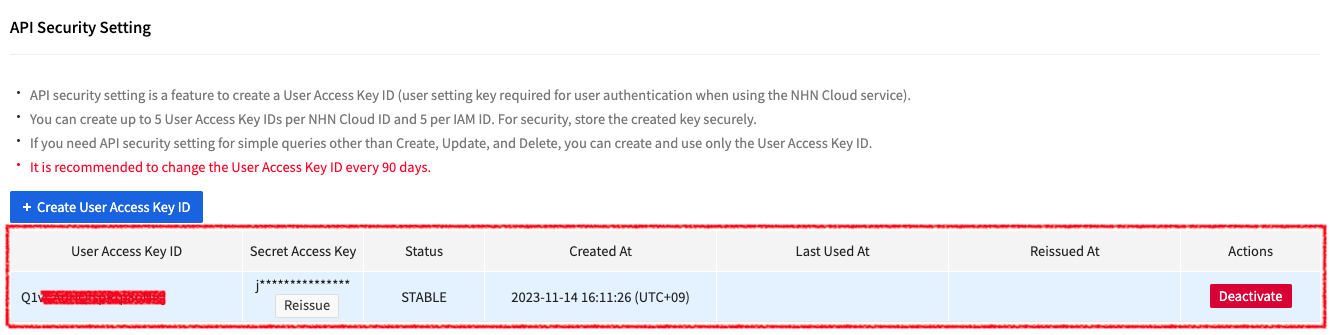
Table of Contents
- Security > Secure Key Manager > Console User Guide > Getting Started
- Create a Key Store
- Key Store Details
- Create a Key
- Import a Key
- Register Authentication Information
- Register IPv4 Address
- Register MAC Address
- Register Client Certificates
- Manage User Data
- Delete User Data
- Rotate Symmetric/Asymmetric Keys
- Authorization for Add/Delete Keys API
- Create User Access Key ID, Secret Access Key